Blog

  • How to flower a fence with annual climbing flowers

    How to flower a fence with annual climbing flowers

    How to quickly create a privacy screen with annual climbing plants? They are sown in the spring in the ground, develop in summer then die in autumn.

    How to set up a hedge in your gravel yard?

    In a yard stabilized with pebbles, the establishment of a hedge requires digging a deep trench. On the other hand, without damaging the ground, it is possible to create a barrier between the two spaces by unrolling a wire mesh maintained by posts.

    What soil does it take to make a seedbed?

    To sow a hedge, the earth must be composed of topsoil mixed with compost to a thickness of 20 cm. This will make it possible to cultivate ipomeas, nasturtiums, and sweet peas during one season, which are sown in pockets of 3 to 5 seeds from April.

    Flowered wire mesh: sow large-flowered ipomeas, volubilis

    The large, funnel-shaped, very bright flowers of the ipomea volubilis open in the morning and close in the afternoon. They can remain closed during the day in cloudy weather or when the nights are longer than the days (autumn equinox).
    Ipomes have very many thin, twining stems covered with heart-shaped, light green satin leaves. Its large, pure blue flowers are funnel-shaped.
    The many varieties display various colors: sky blue variegated with white, dark red …

    Flowered wire mesh: sow sweet peas

    Annual or perennial, the sweet pea presents twining lianas which are covered with butterfly-flowers in tender colors and some of which have an enchanting scent.
    The sweet peas can climb to over 2 meters. In this category, there is a perennial sweet pea ( Lathyrus latifolius ) which grows again every year in the same place. It blooms from May until July. Its carmine-pink flowers are not fragrant.
    The annual sweet pea ( Lathyrus odoratus ), has fragrant flowers which bloom from May until September, its flowering is longer. It displays various shades of mauve, purple pink, red, purple, blue …

    Flowered wire mesh: sow climbing nasturtium

    At the foot of a fence, prefer climbing nasturtiums ( Tropacolum majus ). Whether dwarf or climbing, nasturtiums always have the same types of flowers with 5 rounded yellow, orange or red petals. Nasturtiums are also used as ground cover.

    How to sow ipomeas under shelter?

    Ipomes, sweet peas and nasturtiums are grown directly in the ground but if you want to obtain an early flowering, the seeds must be sown under a shelter from March by placing as for the pockets, 3 seeds per pot.
    Then the young shoots are planted at the foot of the fence after any risk of frost.

  • FORTIS (Giant Star) clematis

    FORTIS (Giant Star) clematis

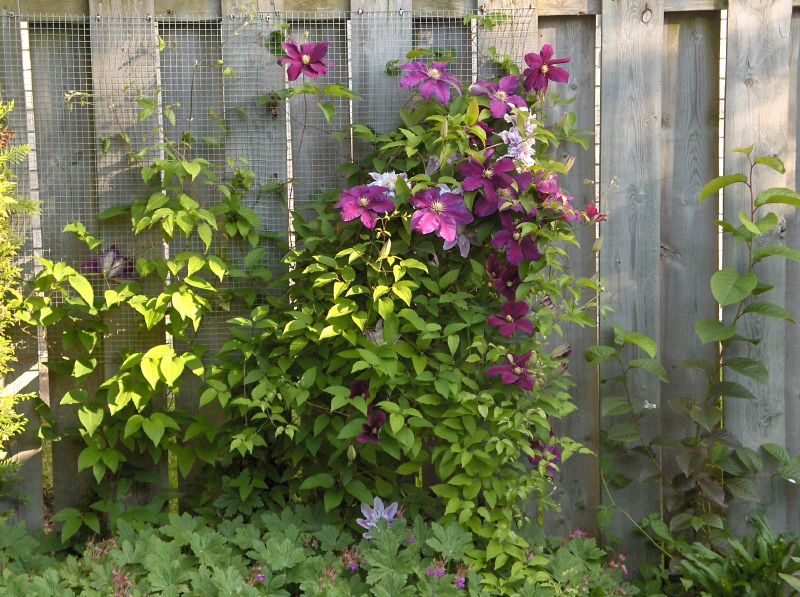
    Beautiful climber offering a spectacular and delicately scented bloom, the FORTIS ‘Giant Star’ clematis is the ideal plant to dress a fence, a trellis, or the trunk of an old tree. It literally covers itself with large, pale pink flowers to celebrate spring and its purple foliage further adds to its unmistakable charm.

    Technical sheet

    Type of plant: climbing plant
    Dimensions: 4 m high – 3 m spreading
    Flowering: from April to May
    Exposure: partial shade, sun
    Planting: autumn / spring
    Propagation: cuttings
    Watering: regular
    Hardiness: very good from -15 to -20 ° C.

    Cultivation conditions

    The FORTIS ‘Giant Star’ clematis is a very hardy plant that tolerates negative temperatures down to -20 ° C. This strain, created by Richard Mitchell, a famous New Zealand breeder, is part of the Montana group of clematis known for their vigor and opulent flowering. FORTIS ‘Giant Star’ clematis adapts to all types of soil provided they are well-drained. It does as well in full sun as in partial shade. 

    Planting

    Plant FORTIS ‘Giant Star’ clematis, in autumn or spring in soil previously loosened and amended with compost and a handful of the crushed horn. Choose a semi-shaded location in the south of the country or in full sun everywhere else.
    Dig a 40 cm planting hole in all directions. Install the plant, root ball slightly inclined, and fill the hole with the soil previously prepared.
    Form a small mound of earth around the crown of the plant to prevent wilting and promote the release of vigorous shoots from the base. Place a tile over the root ball, or a potted bush plant that will provide shade at the roots at the base of the plant. Clematis grows well with its feet in the shade and its head in the sun. Fold the stems 30 cm from the base above a bud and start leading them on the support to help them climb.

    Watering

    Water regularly at planting and the following weeks if it does not rain, to ensure a good recovery. In summer, water once or twice a week so that the soil only dries up a few centimeters between two waterings, especially in summer. Be careful, clematis does not tolerate excess water at the roots, always water at a distance of 40 cm from the foot, often but moderately, especially in heavy and clayey soil.

    Fertilizer

    Scrape compost at the base of the plant in fall and February.

    Diseases and pests

    Clematis is sometimes sensitive to wilting of foliage and stems in too heavy or too wet soil. Drain the soil well or plant on a mound and water 40 cm from the base moderately but regularly in summer.

    Cut

    FORTIS ‘Giant Star’ clematis blooms on the stems of the previous year. Prune immediately after flowering.
    Cut any stems that are dead, damaged, or too long to contain this exuberant plant. 

    Use

    The FORTIS ‘Giant Star’ clematis is an ideal plant to hide a fence, an old tree trunk, or to dress a facade with a trellis. It goes well with climbing roses but also with wisteria whose flowering it will prolong.
    It is also possible to cultivate this beautiful climber in a tray on a balcony or a terrace, trellised to a wall or a trellis, or even on the balcony railings.

  • How to grow Mauritanian mallow in the garden?

    How to grow Mauritanian mallow in the garden?

    Most mallows grow near farms, in vacant lots, or in landfills, wherever they find soils rich in nitrates.

    Description of mallow

    It is also called Mauritanian mauve, large mauve, woodland mauve, sylvestre mauve.
    Mallow can be confused with lavatera or hollyhocks. To recognize them, you must examine its flower: it has a pink corolla with 5 indented petals at the edge in the shape of a heart, a calyx with 5 lobes lined with a calicle with 3 leaflets, and numerous stamens united by their net in a mass prominent, 12 stigmas and later 12 carpels arranged in a crown in the fruit.

    Flower vocabulary:

    The corolladesignates the part of the flower formed by all of its petals,The chaliceconsists of all the sepals.Caliclerefers to the leaves, usually green and small in size, which lie between each sepal to form a double calyx to protect the flower.The stigmais the end of a carpel forming the pistil of a flower. The function of the stigma is to capture the pollen.The carpelencloses the eggs. It turns into fruit after fertilization.

    Characteristics of mallow (malva sylvestris)

    The purple of Mauritania, an annual, biennial, and perennial are considered. It can reach 2 meters in height with ivy-shaped leaves. It is often present in the seeds of field flowers.
    Its flowers are honeyed and very attractive to a multitude of insects. They appear from June to September.

    How to cultivate mallow?

    Mallow prefers partial shade at the edge of woods in limestone and clay soils provided they are not too compact.
    It is particularly sensitive to rust which makes its leaves unfit for consumption.
    Mallows are sown directly in place among other field plants from April and bloom in July. The first year the mauves hardly exceed 1 meter in height. It can then reappear in the second and third years as a perennial.
    Sowing in July-August, the mallows do not flower until the following year and present a greater development than the first year.

    Using mallow in cooking

    The dried flowers and leaves are used in medicinal preparations. In cooking, its leaves can be eaten cooked and raw in salads when they are very young. Flowers are decorative and can add color to dishes.

  • How to sow true lavender: the right actions

    How to sow true lavender: the right actions

    Lavandula angustifolia or more simply officinal lavender. Here we will find out how to easily sow it. It should not be confused with lavandin which is a hybrid between true lavender and asp lavender which is reproduced exclusively by cuttings.

    Harvesting lavender seeds in autumn

    The seeds were collected after winter, lodged in the dried inflorescences. In principle, the seeds are harvested in autumn. True lavender hardly exceeds 50 cm in height, while lavandin can climb much higher.

    Sowing in March

    After the harvest, that is, in March, the small black seeds were sown in a bucket filled with a mixture of universal potting soil, garden soil, and a little sand.
    The goal is to obtain a rather lean and light mixture. Never use rich potting soil for lavender seedlings. In March, the sowing was able to take advantage of the heat which favored the emergence of a small part of the seeds.

    Sowing in June

    If you do not have a heated greenhouse, wait until June to sow the lavender seeds, always according to the same principle.
    Emergence can be very long and some seeds can wait an additional year to germinate, which is often the case in nature.

    How to sow your lavender seeds?

    1. Distribute the seeds on the lightly packed substrate.
    2. Cover the seeds with a thin layer of soil.
    3. Pack the seedbed.
    4. Dip the cup to moisten it by capillary action.
    5. Place a small canvas on the seedling to prevent drying out (wintering veil).
    6. Lavenders can take several weeks to germinate so you have to be patient.
    7. Store lavenders in their pot in the heat for at least 1 month if they are not very dense.

    Transplant the lavender

    1. Transplant the young lavenders in pots with a light soil and slightly richer than the soil for seedlings.
    2. Keep the soil moist until the next repotting in a larger pot 12 cm in diameter or plant directly in the ground in full sun. Keep a space of 50 cm between each plant. The ideal is to wait until the following spring before considering a permanent planting.

    True lavender grows above 800 meters in elevation in dry, stony areas and in limestone soil. It tolerates the cold very well when the soil is well-drained. It is the ideal plant to install in a rather dry slope. On the other hand in wet and clayey soil, it will disappear in the first year of culture. True officinal lavender is particularly popular in a raised vegetable patch.

  • How to prune to maintain passionflower?

    How to prune to maintain passionflower?

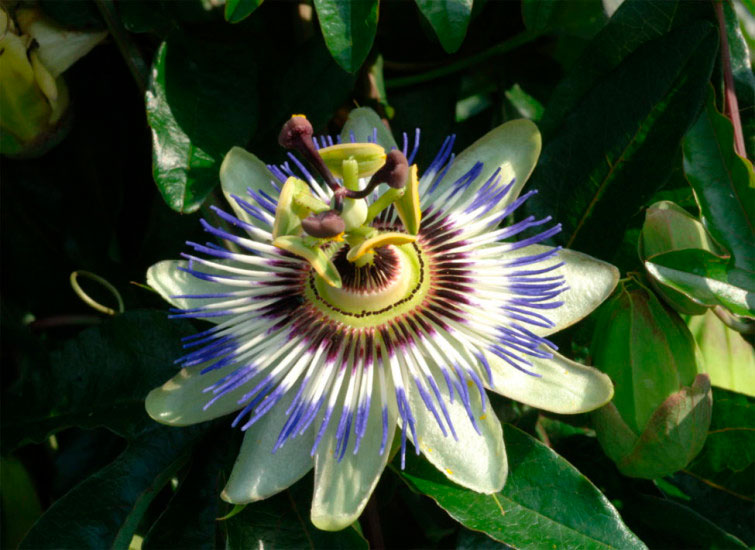
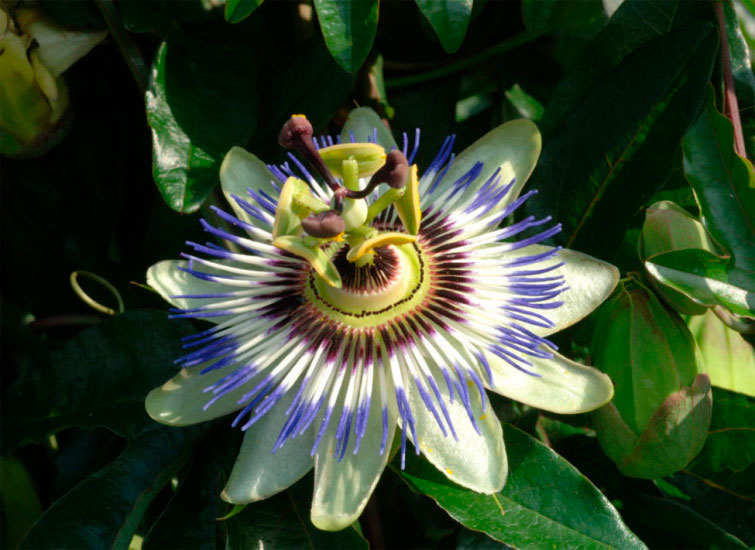
    The maintenance pruning of passionflower, light, allows to discipline this very growing vine and to clean it from old wood. On the other hand, after a few years, the passionflower becomes important and confused. It must be folded down to refresh it. The operation is also necessary when it freezes.

    When to prune passionflower?

    Always prune the passionflower in spring (March). It flowers mainly on the twigs of the year: pruning allows them to be obtained in large numbers.
    There is no need to intervene during the first years of the plant. Start after about four to five years, then renew annually thereafter.

    How to prune passionflower?

    Tools needed:
    pruning
    shears
    hedge trimmers

    • To prevent the whole from becoming a muddled mass, shorten all the shoots from the previous year (unbranched) to about 20 cm with a secateurs.
    • Remove the weakest among them.
    • If in doubt, or if the plant has been neglected for a long time, “comb” it with a hedge trimmer.
    • Return to normal size the following spring. On very vigorous plants, summer pruning helps to avoid lawlessness. It is enough to cut back by two-thirds the unruly new shoots.
    • After a few years, we must resort to coppicing, as well as in case of frost. A good way is to shorten every three years a third of the carpenters (the diameter of the finger, approximately) to 50-60 cm from the ground.

    When to cut back passionflower?

    Work in the spring (March).

    Necessary material

    • Secateurs ,
    • Shears,
    • Force pruner (delimber).

    How to cut the passionflower?

    For a four-five-year-old plant:

    • Shear the whole plant, like a hedge. It should lose about two-thirds of its thickness and height.
    • With the secateurs, remove at the base the strong branches badly placed.
    • Repeat about every four years.

    For a neglected plant it is impossible to catch with the shears:

    • Cut the carpenters with secateurs at about 1 m from the ground.
    • Eliminate the rest.

    Following a frost:

    • Cut back the carpenters short, to the living wood. Frozen woods are easy to recognize (they turn black very quickly).
  • How to easily cut hyssop in a smothered way?

    How to easily cut hyssop in a smothered way?

    If the hyssop is often cited in holy books, it is sorely lacking in gardens, and yet this small shrub with multiple properties is very decorative with its blue flowers. Presentation of this Mediterranean plant and its multiplication by cuttings.

    The hyssop ‘ Hyssopus officinalis ‘ also called “sacred herb” is an aromatic perennial plant which grows in the rockery of the poor soils of Haute Provence. It is part of the same family as lavender hence its resemblance. She appreciates the limestone and the heat. It is the opposite of heather earth plants. In short, it is a rock garden plant and full sun.

    Flowers and flowering of hyssop

    Smaller than lavender, it could be confused with its spikes of blue-purple flowers that bloom from June to September. Very melliferous, it attracts many useful insects in the garden. Smaller than lavender, it hardly exceeds 30 cm.

    Recognize the leaves and foliage of hyssop

    Hyssop, from the labiate family, has square stems with shiny, lanceolate green leaves whose strong smell is very pleasant. In small quantities, its leaves can flavor salads. Hyssop is used as an infusion to clear the airways.

    How to cut hyssop: step by step

    In the spring I attempted a seedling which turned out to be unsuccessful due to damping-off, a microscopic fungus that decimated the young seedlings. The failure may also be due to too acidic seed soil.
    This time, to make my cuttings I will not fail to use my own substrate with a mixture of sand and a pinch of wood ash.
    Cutting the hyssop:

    1. Fill 10 or 12 cm pots with the substrate.
    2. Water the pots.
    3. Detach the cuttings at the level of a stem.
    4. Gently remove the leaves from the bottom.
    5. Prick the cutting into the wet substrate.
    6. Cover with a clear bottle.
    7. Keep moist until rooting.

    Transplanting the cutting in the garden

    Place the cuttings before the end of summer in well-drained soil, ideally in a raised garden patch. Health
    tip: In infusion, hyssop leaves are beneficial for the bronchi

  • Choosing and installing a climbing plant under the roof

    Choosing and installing a climbing plant under the roof

    Garnish the space between the windows and the roof with a decorative climbing frame and fruit holder. Stretch two rows of wire so that the branches of the Actinidia (kiwi) are held there or brush them.

    The ideal plant

    The Actinidia needs room to elongate its twigs, which are 7-10 m in length. Choose the ‘Solo’ variety, it is self-fertile and will produce fruit without being associated with a male plant. In addition to the kilos of fruit to harvest before the first frosts, you will enjoy the white flowers in June and the large, velvety leaves. Out of date, they will clear the windows in winter.

    Planting

    In winter or early spring, if it does not freeze. Add compost, horn, and fruit fertilizer. Moisten the root ball and tilt it towards the wall. First, guide the branches vertically to the top of the wall, then horizontally.

    Maintenance

    At the end of winter, prune the branches that have fruited, two eyes after the last fruit is harvested, and leave the peduncles to help you. In July, shorten the stems, keeping four leaves after the last fruits. Cut off the long, sterile twigs at their base.

  • When and how to plant bamboo: tips and method

    When and how to plant bamboo: tips and method

    Belonging to the Poaceae family, like grass species, bamboo is common in southern regions and hardy as far as Ile-de-France on condition that it offers it a sheltered location.

    • Material:
    • spade
    • potting soil
    • sand
    • lawn fertilizer
    • watering can
    • claw
    • mulching

    Advice:
    To be sure of the recovery of your bamboo , choose a subject raised in a container. Also wait until the frost has passed. There is nothing wrong with intervening in April, or even in May, to put it in place.

    Good to know:
    It is not necessary to stake the bamboo; it takes root quickly. Few new stems develop during the first two or three years, with all activity occurring underground during this time.

    Dig a planting hole

    Bamboo is a very easy plant to grow, sometimes even invasive when it finds a good location.
    Start by digging a planting hole whose volume is twice that of the root ball.
    Decompress the bottom with the spade.

    Fertilize

    If the extracted soil is a little too heavy and clayey, add sand or potting soil to lighten it.
    In the bottom of the hole, throw a few handfuls of lawn fertilizer. Cover with a little soil.
    Take the bamboo out of its container without breaking the root ball.

    Place the bamboo in the ground

    If the roots adhere to the container, do not hesitate to cut it to avoid damaging them.
    Place the bamboo in the middle of the hole, the top of the root ball should be a few inches below ground level so that it is covered.

    Cover, pack and water

    Slide the earth around the root ball, tamping down regularly to eliminate any risk of an air pocket, which is detrimental to recovery. Cover the root ball and continue to tamp with your foot.
    Water abundantly, even if it is raining or the soil is wet. Regularly renew this watering.

    Scratch and mulch

    In order for the soil to retain all its moisture and also to hamper the emergence of weeds, cover the soil with mulch after taking care to scratch it to decompact it. A thickness of 5 to 10 cm is necessary, depending on the material used.

    Contain bamboo

    When planting the bamboo, install an anti-rhizome barrier around the perimeter of the planting hole.
    Slightly tilt this obstacle outwards: the rhizomes will butt against the barrier and rise again. It will then be easier to eliminate them.
    If this precaution was not taken when planting the bamboo, it is still possible to dig a trench around the massif of this grass to install this anti-bamboo barrier.

  • Install straight and drooping geraniums on a balcony

    Install straight and drooping geraniums on a balcony

    It is possible to flower a balcony with a multitude of flowers more or less resistant to shade, sun or drought. Know that to create a blooming and resistant balcony, the sure value remains the geranium.

    The different varieties of geraniums

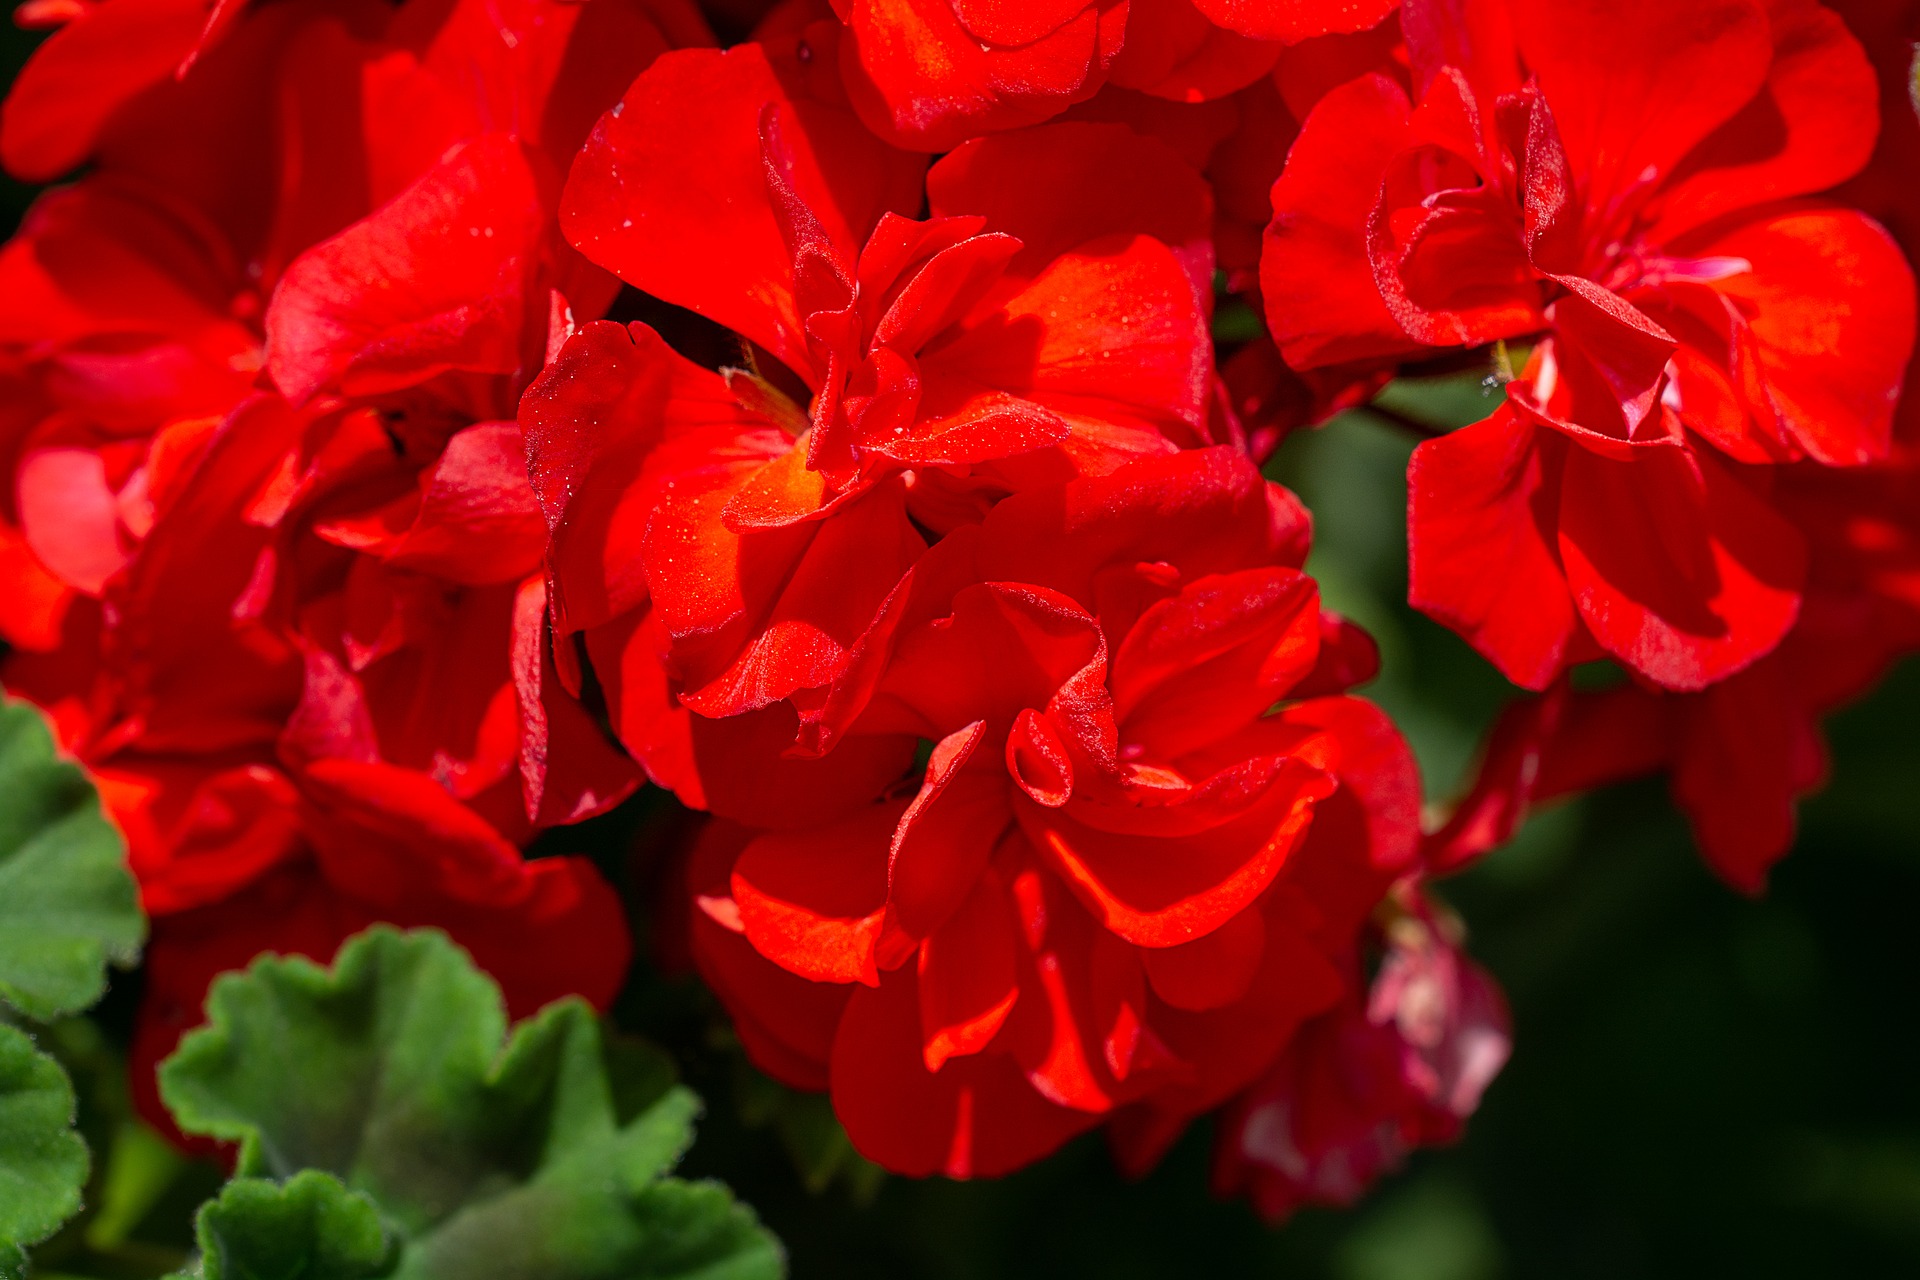
    Geraniums were for a time wrongly classified as obsolete plants. In geraniums or rather pelargoniums, there is an incredible amount of decorative and solid varieties to adorn planters.
    It is no coincidence that certain species bear the popular name of “king of the balconies” . Although this is the simple red ivy geranium, one could easily call all geraniums “king of the balconies”.

    When to plant geraniums on the balcony?

    Unlike in the open or in a bed, geraniums in planters installed on a balcony are easier to shelter from the cold. In case of frost, they can be sheltered from the cold.
    They can take place on a balcony from April.

    What exposure for geranium?

    Geraniums love the sun , however, they can also be placed in partial shade. We avoid the northern exposure not that they will not develop but the flowers will be less abundant . Instead, reserve the shade for fuchsias or impatiens.

    Which planter to choose?

    If terracotta planters are more aesthetic, they have the disadvantage of increasing the weight on a railing. In addition, in the event of a fall they will be more dangerous for passers-by.
    Plastic planters are fine as long as they are strong enough not to warp. It will also be necessary that the volume of potting soil is sufficient for the geraniums to take root properly .
    Planters should be drilled with drainage at the bottom. Drainage can be done with clay balls or chippings placed on the drainage holes.

    Choose the right land

    You can make your own geranium soil with a mixture of universal soil, compost and garden soil. The recipe for geranium soil can vary depending on the nature of your garden soil. Although clay retains water, in excess it can be harmful to geraniums .
    Otherwise, you can find geranium soil everywhere, which is used pure, without adding soil or compost.

    Planting geraniums in planters

    Before planting, remove all advanced inflorescences and keep only the flower buds at the start of coloring. Remove all yellow leaves. Soak the pot for a few seconds in water then delicately remove the geranium. The white roots should go around the pot.
    The geraniums or zonal rights are placed at the back of the planter and ivy geraniums in front. No need to break up any clods or unravel the roots. This operation is even harmful for the recovery of geraniums. Pack around the geraniums then water copiously the first time.

    Install saucers under your planters

    The saucers allow you to conserve the irrigation water and avoid watering too regularly.
    Then wait a week before watering so that the roots go in search of moisture and occupy the entire space of the planter.
    If the temperatures are cool, water preferably in the morning and vice versa if it is hot, water the planters in the evening.

    What to do with geraniums in the event of a rainy spring?

    Despite rainy, stormy and very watered periods, a balcony of geraniums can very quickly become flowering again, provided that all the faded flowers or not are removed. During spring and summer, a balcony can suffer from meteorological hazards, starting with a hail storm, wind or more simply a long rainy period. The weather is gray and the temperatures are cool … in short, the weather is not there for the geraniums.

    What to do in the rainy season?

    Start by removing all the faded flowers as well as those barely blooming. The best technique is to remove them with the petiole up to the stem. If the weather forecast is still gloomy for several days or if you are away for a week, you can also remove the buttons at the start of coloring. This method makes it possible to avoid diseases and especially to strengthen the geranium plants. A removed button is immediately replaced by three new inflorescences which will emerge from the geranium.

    Remove the yellow leaves

    As long as they are located at the foot, there is nothing to worry about: it is the old leaves lacking in light that are disappearing in favor of a new generation. Only in wet periods can they rot and devalue the geranium. With the sun, the problem does not arise.

    Empty the saucers

    Geraniums are drought tolerant very well , but excess water prevents the roots from developing and can even cause them to rot. As a result, the geranium turns yellow and no longer blooms.

    Wait for good weather to give them fertilizer

    If the geraniums are not spent because of bad weather, it is useless to add fertilizer which could also cause a “liver crisis”. As soon as the weather is more favorable, add half-dose fertilizer the first time, then increase as soon as the geraniums regain their vigor.

    What if her geranium has broken?

    On a balcony, we are not immune to a gust of wind, an unfortunate gesture or a thunderstorm …
    Above all, don’t panic, a branch broken by a gust of wind can be cuttings to give birth to several geraniums which from the first year can overflow a small planter.

    1. Fill a planter 2/3 full with a cutting soil or a universal soil extended with sand and a little garden soil.
    2. Soak the planter.
    3. Prepare the cuttings by detaching them from the main branch, removing the flowers, buds and leaves from the bottom.
    4. Prick each cutting without pushing them too far in 1 to 2 cm.
    5. Cover the cuttings with a wintering veil for at least a week.
    6. Place a saucer under the planter and put it in partial shade.
    7. Water under the saucer once or twice a week depending on the temperature.
    8. Rooting begins about two weeks after transplanting.
    9. no fertilizer.

    Result of geranium cuttings

    Three weeks after planting

    The king geraniums of the balconies are in bloom which proves the success of the rooting of the cuttings. It is still too early to save the first flowers. They must be removed as well as the buds so that the young cuttings can gain strength.

    Remove weeds

    During these 3 weeks, weed seeds have also germinated in the middle of the rooted cuttings, this is the sign that the substrate is suitable for reproduction. It only remains to do a little weeding to prevent the competition from taking hold.

    Remove the yellow leaves

    In humid periods, it is important to remove the leaves, which turn yellow as they go, as they can cause rotting. The first yellow leaves are not a sign of disease, it is only a reaction to the cuttings.

    Blow the cuttings of geraniums

    This operation is called “blowing” by horticulturalists, it is in fact a pinching of the end of the cutting between the thumb and the index finger to allow the cutting to emit several stems and to be more strong thereafter.
    Make a watering sparingly as sunshine and heat. Young cuttings should not lack moisture at this stage, otherwise the first roots will be lost. Be careful, excess water is even more harmful than lack of water.

    Do not give fertilizer

    After three weeks, it is still a little early to fertilize the cuttings. At this stage, there are still fertilizer residues in the substrate for the young ivy geraniums (Pelargoniums peltatum) to use. Wait 1 additional month to start adding diluted fertilizers.

    How to fertilize geraniums?

    When to fertilize a geranium?

    A geranium gardener is a marathon runner who must cross the finish line in great shape and without incident. Before starting, the rider must be in good health. The plants chosen must first be healthy and vigorous .

    Moderate fertilization during repotting

    At the start, the athlete takes care of himself without forcing too much. He runs while saving his strength. When repotting, the geraniums are planted in a suitable substrate that is neither too rich nor too poor.

    Balanced watering

    The first waterings are to be given sparingly, we do not water a plant that is bathed in water with yellow leaves. It is drowning assured.

    Little cravings at the start of summer

    After several weeks, our geraniums start crying out for famine. No need to wait for the first signs of fatigue. You must add a granulated or liquid fertilizer.
    But be careful without excess, the marathon runner does not yell at the end of 10 KM, he only takes a small snack. Geranium also prefers a fertilizer diluted by half so as not to burn its roots. Small snacks and water on a hot day is the recipe for finishing the race in great shape.

    Fertilize little but regularly

    You can add fertilizer to each watering with solutions divided by 4 for the first fertilization and then by two for the following ones.

    Prune the first flowers

    In order to facilitate new growth of buds and consolidate the plant, we will remove the faded and open flowers from the geraniums at the beginning of the season or just after their cuttings.
  • Successful cultivation of ornamental grasses

    Successful cultivation of ornamental grasses

    There is at least one grass to beautify every corner of the garden and every corner of the garden is suitable for growing grasses. Adopt these plants with multiple attractions to give life and structure to your environment.

    Technical sheet

    Their pollination is carried out by the wind. You will meet annual or perennial decorative species, not to mention bamboos which produce woody stems (hard as wood) and are intermediate with shrubs. However, all grasses regrow from their stump, at least the perennial species.

    Dimensions: variable: from a few centimeters, for grassy forms, to more than two meters for miscanthus, Provence cane, pampas grasses.

    Flowering: grasses do not, strictly speaking, form flowers, but spikelets that are not very colorful, greenish, which last for a long time, taking on pretty beige to golden colors. The first blooms appear from March-April and the last, autumnal, often last until the heart of winter.

    Hardiness: most varieties are hardy. However, splendid exotic species and varieties deserve to be cultivated as annual plants for summer settings or acclimatized in mild regions. This is the case with Pennisetum setaceum such as ‘Rubrum’ or ‘Fireworks’ with leaves variegated with purple or highlighted with pink, canes from Provence (Arundo donax), the large Erianthus ravennaeor sugar cane ( Saccharum officinarum ) including the superb purple variety.

    Invasive or not : 
    There are three categories of grasses.

    • The creeping grasses , that is to say extending through rhizomes and rapidly invade a space. Their culture should only be thought of by considering a culture surrounding them with an insurmountable barrier.
    • The  bunch grasses , that is to say, that grow in clumps. This is the case with the majority of grasses encountered in our gardens. They gradually enlarge over time, like any perennial, but without ever producing a sucker other than at the foot of the mother plant. Like many perennials, their multiplication is done by division of tufts.
    • The grasses short rhizomes . They widen a little, but do not go very far, forming less dense clumps than the bunchgrass grasses. A simple spade at their foot is enough to limit their modest invasion. It is the second largest group of ornamental grasses in number

    When to sow

    • To be practiced in spring for pure species, whether annual or perennial.
    • For varieties obtained by crossing, sowing is not recommended.

    When to plant

    • The planting grasses is done preferably in the spring, ideally from natural regrowth of plants.
    • September is also recommended, the plants then having plenty of time to take root before winter (a period not recommended for less hardy species).
    • In the South, it is preferable to install them in autumn, because the risk of rot by stagnant humidity is less.

    Maintenance and other care

    • Organic mulches will be spread at the foot of shade grasses such as luzules, hakonechloas or deschampsias or damp earth.
    • On the other hand, a mineral mulch (gravel) will be more appropriate for steppe species such as stipas , fescues, calamagrostis.

    Fertilizers and fertilization

    No need to add fertilizers for the good health of the grasses. They are generally satisfied with the reserves of the soil to thrive. Shade or damp earth species will however appreciate a contribution of organic matter when planting: potting soil, compost, dehydrated manure.

    Diseases and pests

    Grown in healthy soil and a well-ventilated atmosphere, grasses are rarely diseased. With excess humidity, rust can settle on blue oats or fescues. Drain the land to compensate for it.

    Cut

    For evergreen grasses such as Stipa tenuifolia, the Deschampsia, or blue oat, content yourself, in late winter, combing tufts of manually using a glove to remove dead leaves. The tufts of deciduous grasses will be cut back as late as possible (in winter) in order to benefit from their decorative culms for a long time in winter. Clean the clumps as soon as the stems weaken. Wait March-April to cut back the semi-hardy and acclimatized grasses.

    Harvest

    Many grasses have inflorescences which keep wonderfully in dry clumps. Do not hesitate to experiment with compositions taking advantage of the great diversity of their golden or silver inflorescences.

    Multiplication

    Strain division is widely used to propagate interesting species and varieties. It is best practiced in spring, when the plants start to grow again, failing which in September. So they are able to form new roots quickly and in abundance in hot soil. Grass species are innumerable and difficult to differentiate in nature. In the garden, we recognize them because they are monocots (recognizable by their parallel veins) and their flowers are primary and not very colorful.

    Grasses (of the Poaceae family) are ubiquitous on all continents. These plants are popular in contemporary gardens where they instill a natural, wild and lively note. They are appreciated there for their silhouette, their sometimes colored foliage, their flowering, and their fall colors.
    Thus, their graceful vegetation marks the rhythm of the seasons.
    The flexibility of their culms (stems), their foliage, and their inflorescences is magnified by the wind, then by the frost. They also lighten the massifs by finding their place, according to the species and varieties, either in the shade or in the sun, in dry as in damp earth, in the South or the North of the country.

    Grasses for light in dry ground

    • Anemanthele lessoniana . Hardiness: – 6 ° C. H 80 cm. Reddish orange color for its fine leaves and soft tufted habit.
    • Bouteloua gracilis or “mosquito grass”. H 50 cm. Compact tufts, swarm of horizontal spikelets.
    • Calamagrostis x acutiflora ‘Karl Foerster’. H 1.80 m. With an upright, narrow habit, like an exclamation point in the flower beds. Spikes erected in June, beige then golden until winter.
    • Calamagrostis brachytricha or “diamond grass”. 1.20 m in all directions. With supple habit and feathery ears, catching dew.
    • Cortaderia selloana or pampas grass . H up to 3 m. Foliage in dense sheaf and large silvery or golden beige feathers until winter. 
    • Elymus magellanicus. H 45 cm. It is azure wheat with steel-blue erect leaves and grainy blond ears.
    • Blue or green fescues in compact tufts for original mottling. H 25 to 40 cm. Thin, erect ears of golden spikelets. ‘Elijah Blue’ a bright silvery blue; Festuca gautieri, emerald green in flattened cushions or F. valesiaca var. glaucantha with fine leaves, silvery bluish gray and purplish spikes.
    • Melica ciliata or “ciliated melica”. H 60 cm. with whitish cylindrical ears to be planted against the light.
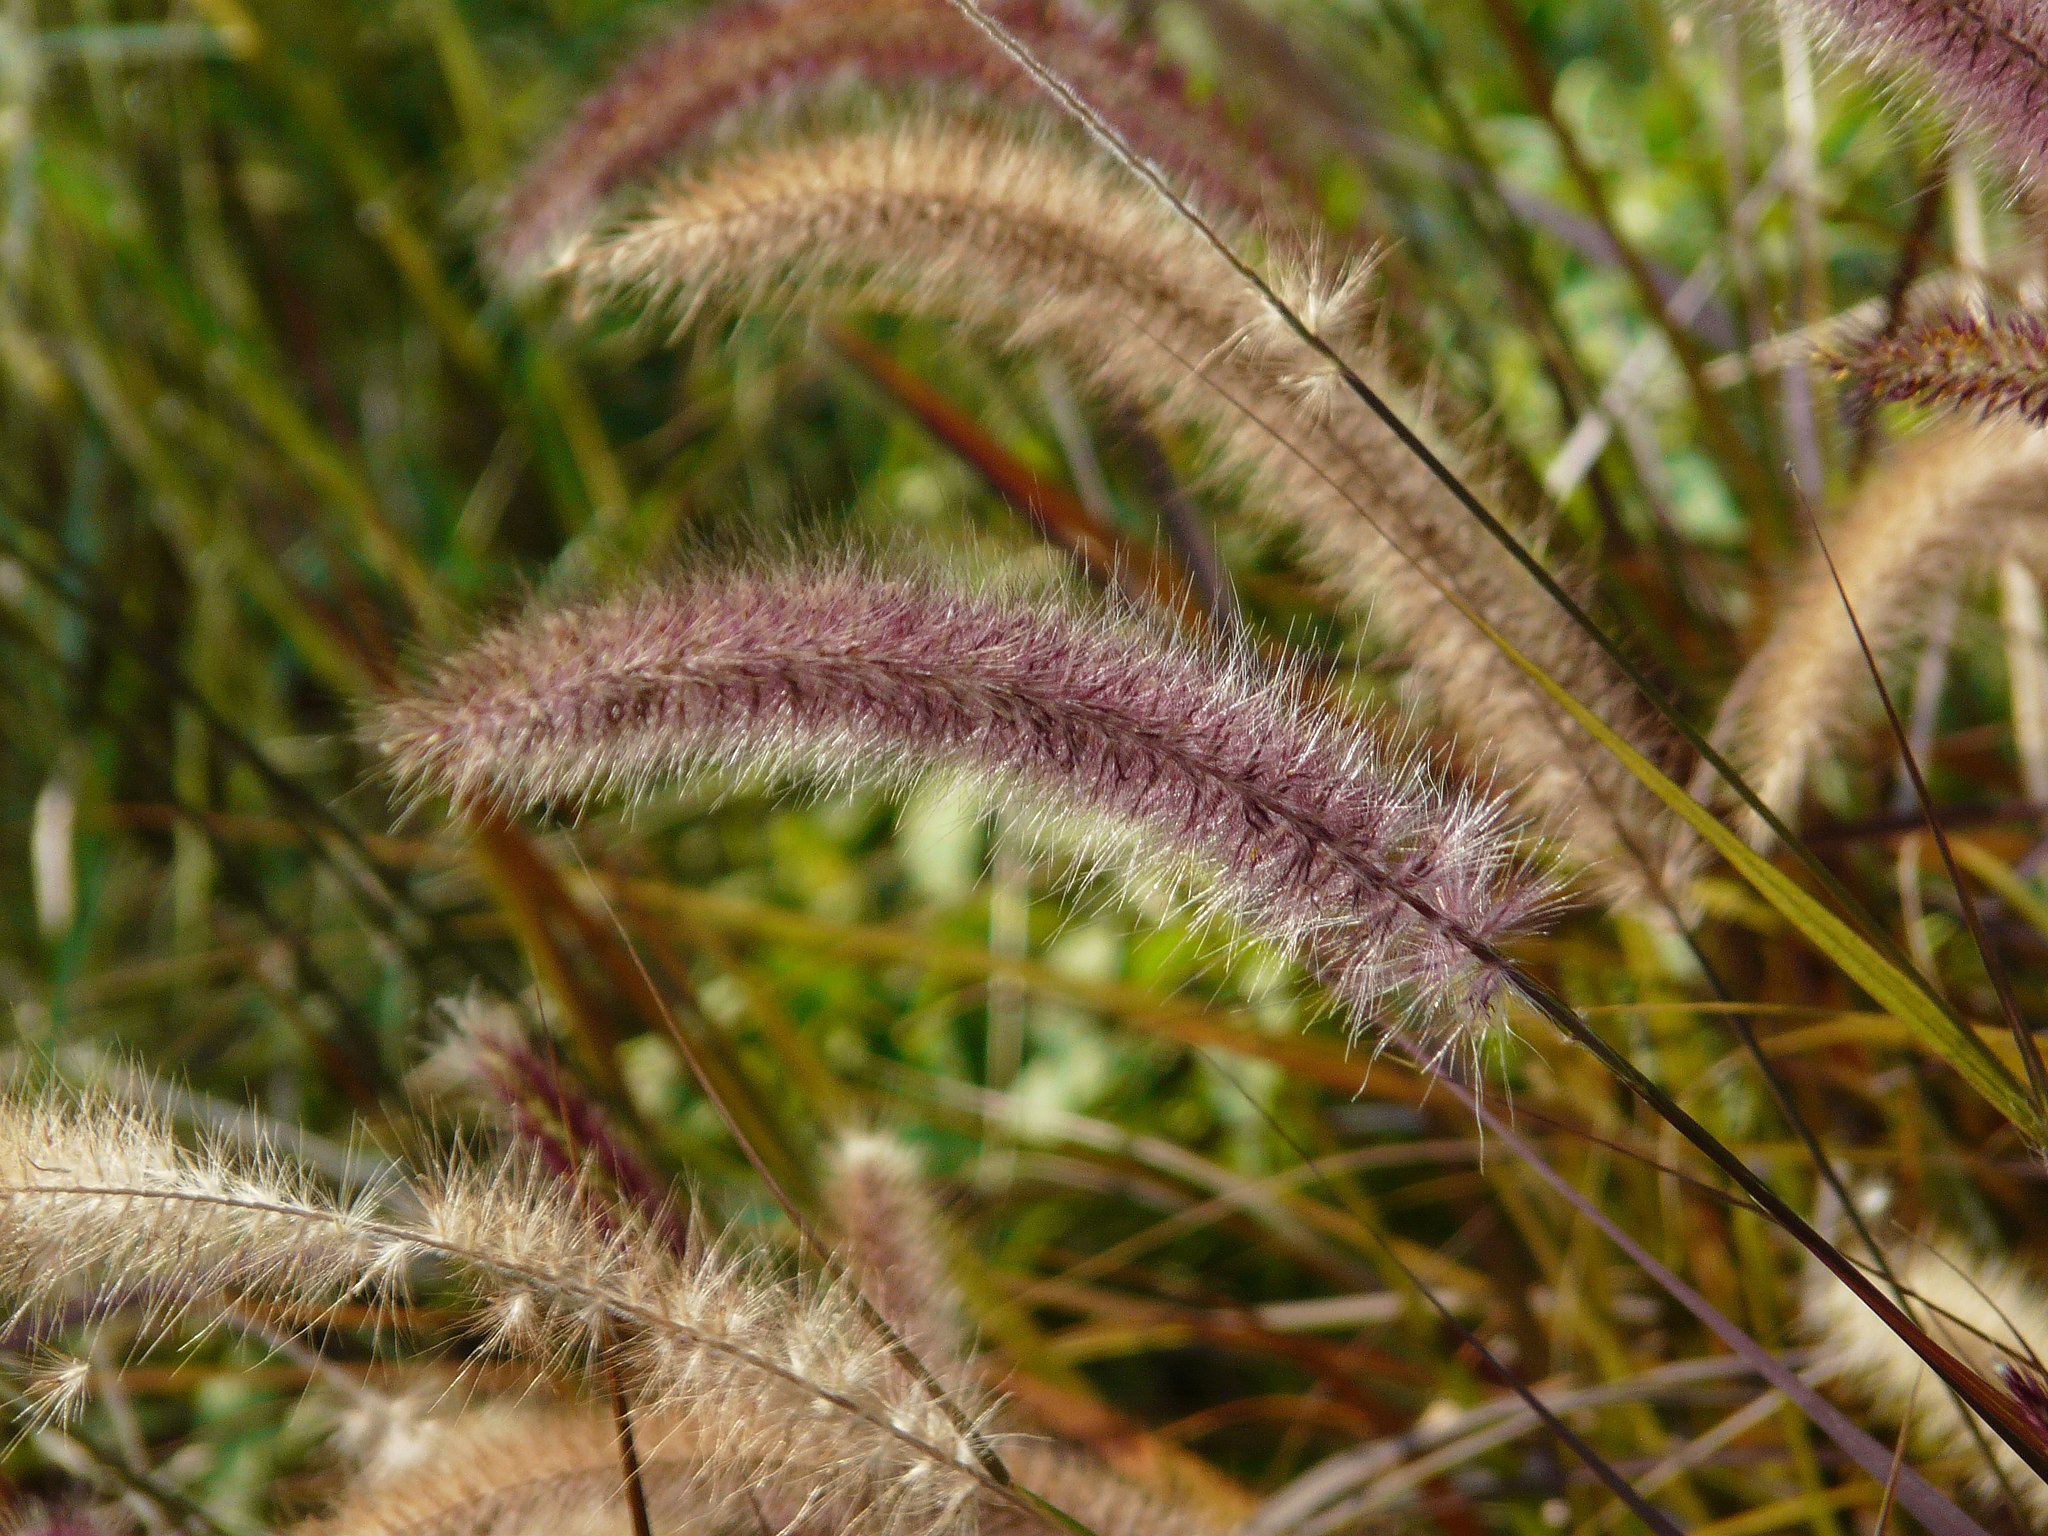
    • Pennisetum alopecuroides . Port in broad sheaf and ears in swabs. Fall splendor! H 90 cm for‘Cassian’s Choice’with orange autumnal foliage, H 45 cm for‘Little Bunny’, dwarf.
    • Oriental pennisetum ‘Karley Rose’   and ‘Tall Tails’ with a more erect silhouette and supple, pink spikes, carried over a meter.
    • Sporolobus heterolepis . H 70 cm. Fine foliage, in a compact and supple tuft. Broad, thin, blond spikes with a scent of popcorn in autumn.
    • Stipa tenuifolia or “angel hair”. H 50 cm. Thin and golden ears, feathery, attracting caresses and supple in the wind.
    • Stipa gigantea rises to 2.50 m with its ethereal allure of irresistible golden wild oats.

    Grasses for light in cool soil

    • Imperata cylindrica ‘Red Baron’ or Japanese Blood Grass. H 35 cm. In sucking tufts of erect leaves, tinged with red from the end of summer.
    • Miscanthus sinensis or eulalie offers a plethora of varieties. Robust, erect plants with broad, supple leaves and digitate, feathery, silvery or golden inflorescences. Choose‘Malepartus’, with burgundy then silver panicles, H 2 m; ‘Morning Light’, with very fine foliage, highlighted with silver, H 1.40 m; ‘Cosmopolitan’with broad leaves highlighted in white, H 2.40 m or‘Graziella’with leaves streaked with yellow; ‘Floridulus’is the giant of the genus with almost 3 m. Superb in privacy screen.
    • Panicum virgatum ‘Praire Sky’ . H 1.20 m. Combines upright, metallic blue foliage and thin pink spikes.
    • Phalaris arundinacea ‘Picta’ or Shepherdess’s Ribbon. H 60 cm. Sucker roots, cream variegated leaves and erect spikes, pink in summer.

    Grasses for dry shade

    Among plants assimilated to grasses.

    • Luzula nivea . H 60 cm. Spiky, green, evergreen foliage and flowers in spring white umbels.
    • Luzula sylvatica ‘Marginata’. H 40 cm. Large leaves in tight rosettes, persistent, green edged with cream.
    • Carex morowii ‘Evergold’. H 35 cm. Compact rosette of fine, supple, persistent leaves highlighted with golden yellow.

    Grasses for cool shade

    • Chasmanthium latifolium . H 1.20 m. American grass, deciduous emerald green foliage and supple panicles with large, flat spikelets. ‘River Mist’ is a superb novelty with cream variegated leaves.
    • Deschampsia cespitosa ‘Goldschleier’ or “canche cespiteuse”. Dense tufts of thin, green leaves, surmounted in summer-autumn by a cloud of slender and golden spikelets. H 1.20 m.
    • Hakonechloa macra ‘Aureola ‘. H 35 x 45 cm. Japanese grass with broad leaves, variegated with golden yellow. Spectacular cascading harbor. Slow growth.