Blog

  • Culture sheet: hyacinth (Abelia Chinensis)

    Culture sheet: hyacinth (Abelia Chinensis)

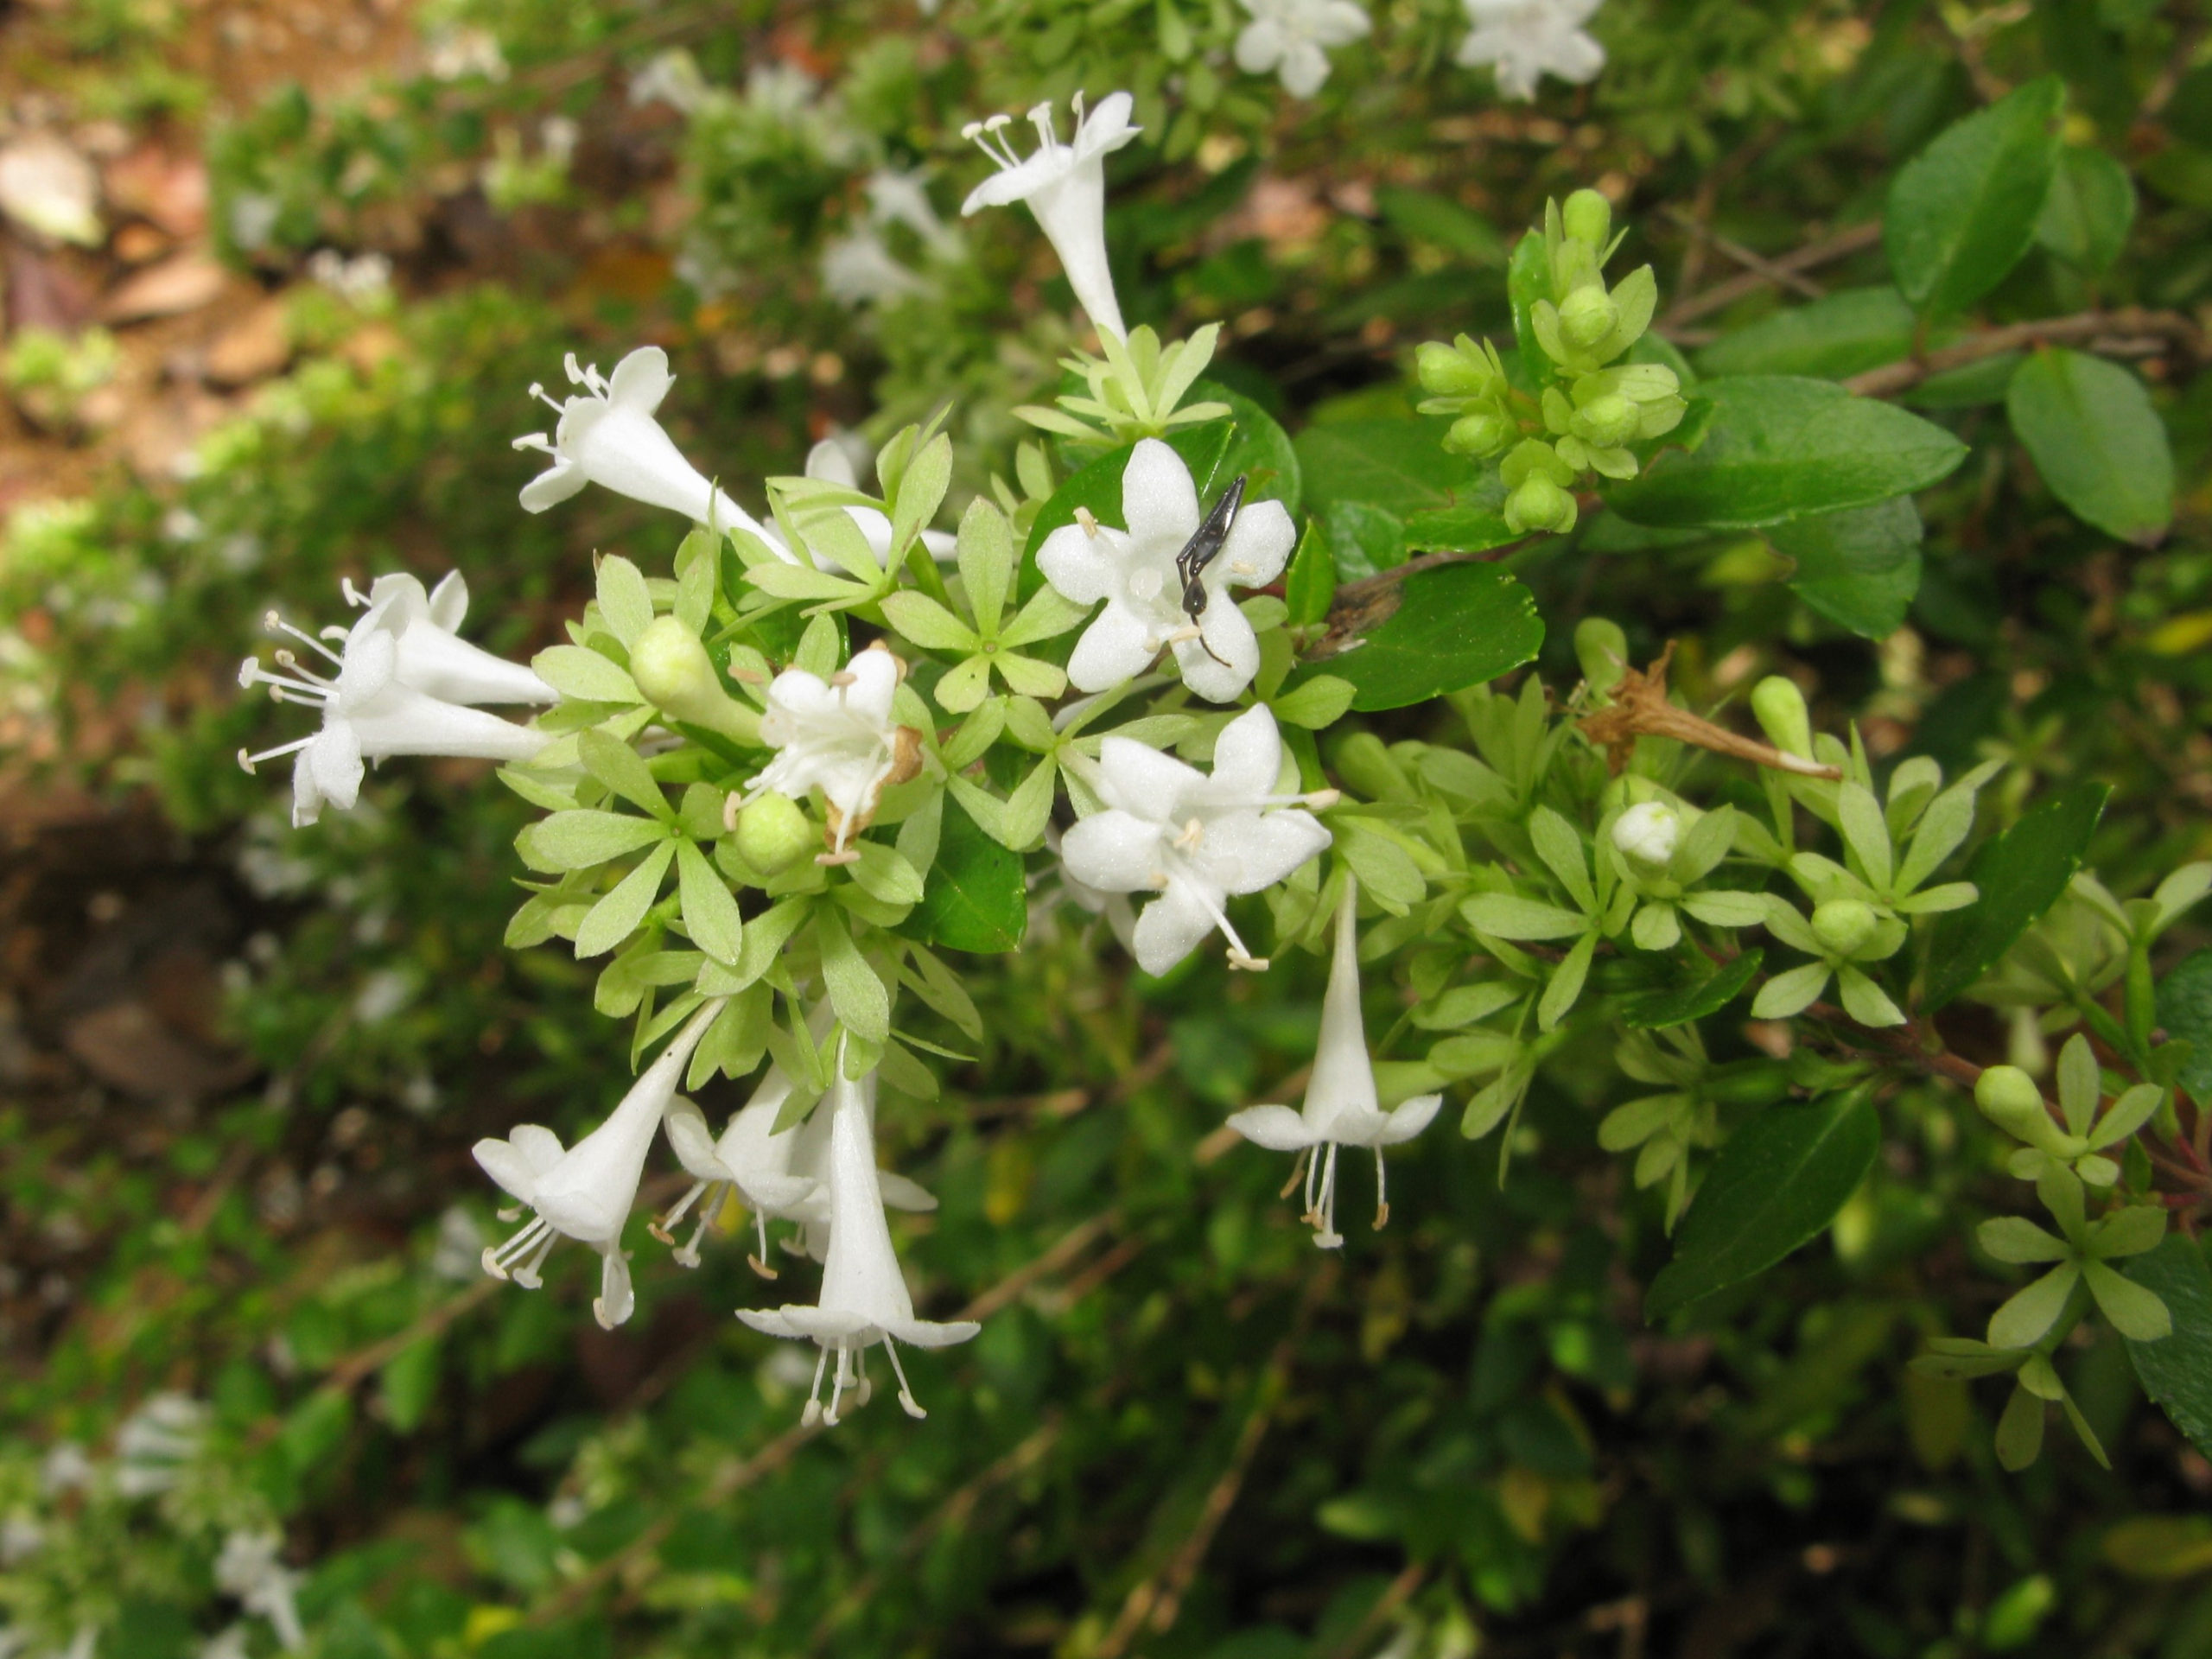
    With its pinkish white ears with a bewitching scent, Abelia chinensis accompanies the blossoms of asters and other autumn beauties.

    Few shrubs bloom at the end of the season, especially among those that attract bees and butterflies. Installed in my living hedge, Abelia chinensis goes unnoticed almost all year round, stuck between a choisya and a buddleia. But at the end of August, when his ears, composed of small panicles of tubular bells of flowers, form, we only see him, we only smell him! A scent of hyacinth. A wonder that I brush against each time I go out to the garden, making a systematic detour to touch it, smell it, and even get a small pinkish white flower. The buttons, as well as the calyces, sport a dapper old rose. These chalices are until November a charming asset, attractive even when the flowers have fallen. Because flowers have the good taste of falling, instead of withering ugly, when they have finished their life.

    I don’t understand why this shrub is so little used. It measures about 2m high and has its place as well in the natural hedge as isolated or at the bottom of a massif. If I am to believe the gardening literature, it grows well in a large container, but I have not tried … Rustic down to -10, even -12 °, it is perfect for gardens located in the south and on the coast. , especially since it supports spray well. In my corner of Brittany, its cute heart-shaped leaves, thick, shiny, and nicely ribbed, turn matt and bronze at the end of autumn.

    Easy to grow

    This abelia loves the sun but tolerates partial shade. All soils are suitable for it, with a preference for those that are drained. Plant it in the spring or fall, mixing compost with the original soil. Water the summer following planting. It hardly needs pruning, except to possibly help it branch out in the first year and to remove dead wood or disturbing branches. It perfectly tolerates drought and is not very sensitive to diseases or parasites.

  • Planting grasses in a pot

    Planting grasses in a pot

    Grasses are decorative perennials in winter. They bring a touch of fantasy to a terrace or a balcony at a time when nature is dormant. Hubert Fontaine shows you all the steps to choose them and install them in a basin.

    Choice of pot or basin

    The basin must be resistant to frost, the earth fiber is a light material which fulfills this condition.

    How to install grasses in a basin: step by step

    • The basin is drilled at the bottom to evacuate the irrigation water.
    • Place a felt over the drainage hole so that it never clogs.
    • Pour a bed of clay balls at the bottom of the pot to drain the basin well in case of heavy rains. Grasses prefer to have dry roots in winter.
    • Cover the drainage with felt to separate the substrate from the clay balls.
    • Fill the basin with universal potting soil.
    • Soak the pots to moisten the clods before planting.
    • Remove the grasses, taking care to scratch the bun intertwined with the roots.
    • The establishment of grasses depends on your tastes with all the same an elementary rule: the large ones at the bottom and the small ones around.

    Choice of varieties

    • Carex buchananii red rooster (Buchanan’s sedge) which sports a light, aerial foliage in the form of a copper-colored vase
    • Calamagrostis acutiflora ‘karl Foerter’ has slender green foliage. This grass turns golden in winter.
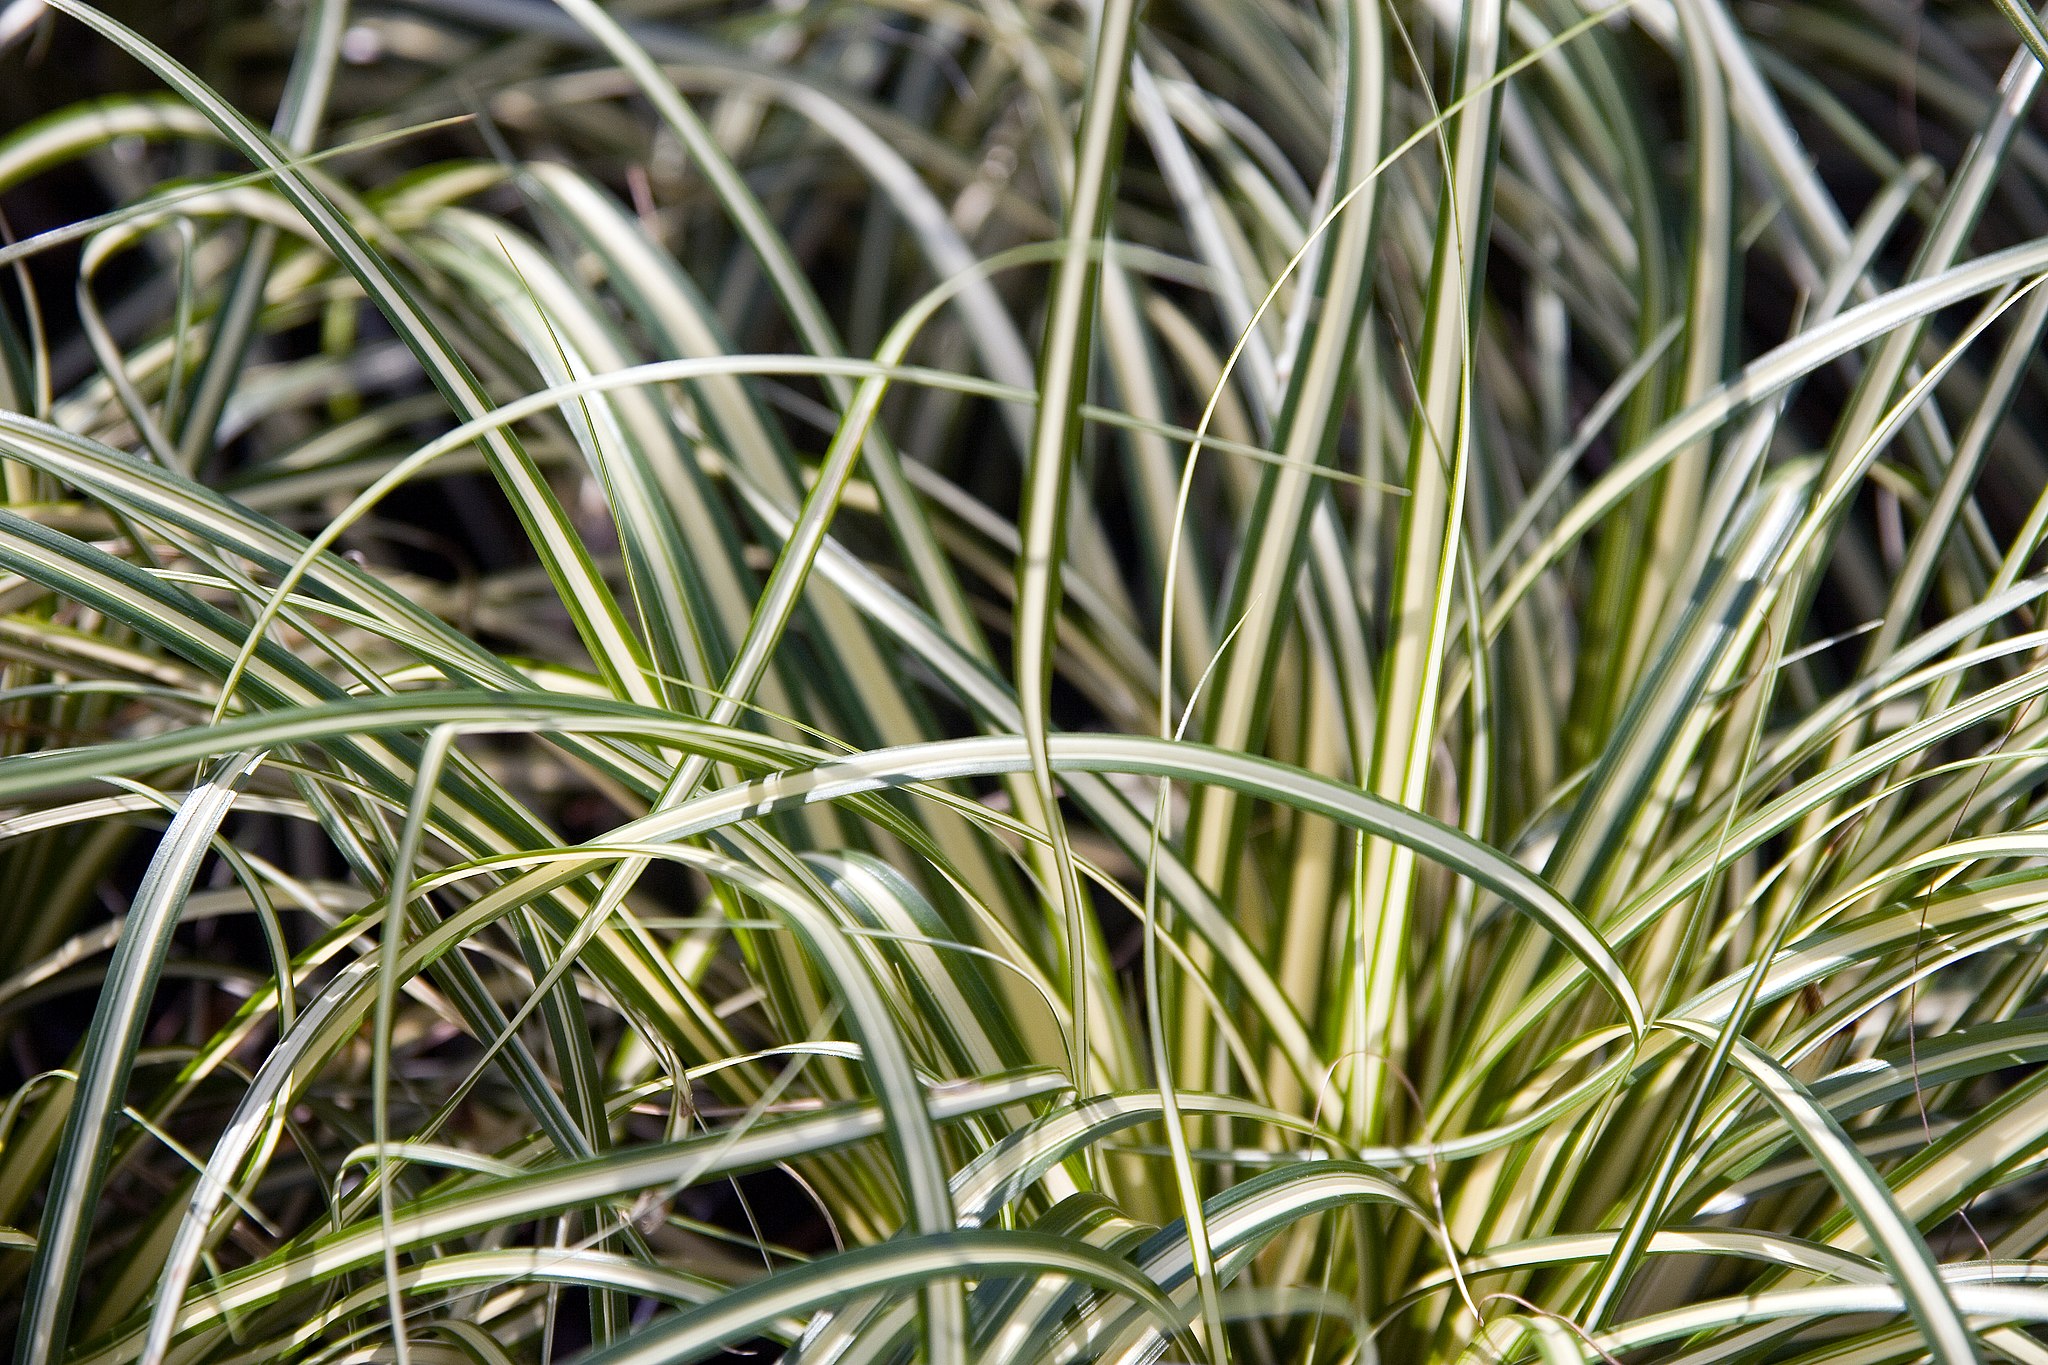
    • Sedge evergold with very bright variegated foliage. These long, drooping leaves follow the contours of the basin.
    • Miscanthus sinensis ‘Kleine Silberspinne’ (Eulalie, Chinese Reed). It is surmounted in autumn by small plumes which sometimes remain hung until spring in the basin.
    • Blue fescue is a steel gray ground cover grass. A spiky hair, it contrasts with other grasses – Angel hair or stipa. Its thin, very flexible leaves fly in the wind. This small, simmering grass is in perpetual motion in the Gautier Fescue basin, also known as bear hair fescue. Very dense, a little spiky, excellent ground cover finds its place at the edge of the basin.

    Trick

    • The pozzolana highlights the basin of grasses. This lightweight volcanic rock protects plants and provides water retention capacity.
    • Water copiously the first time.

    And after

    • Simply water after a long period of frost.
    • In spring, add a grass fertilizer or, failing that, a lawn or bamboo fertilizer.
    • The pruning of the grasses intervenes when they start to set out again on the stump and not before.
  • Pruning grasses at the end of winter

    Pruning grasses at the end of winter

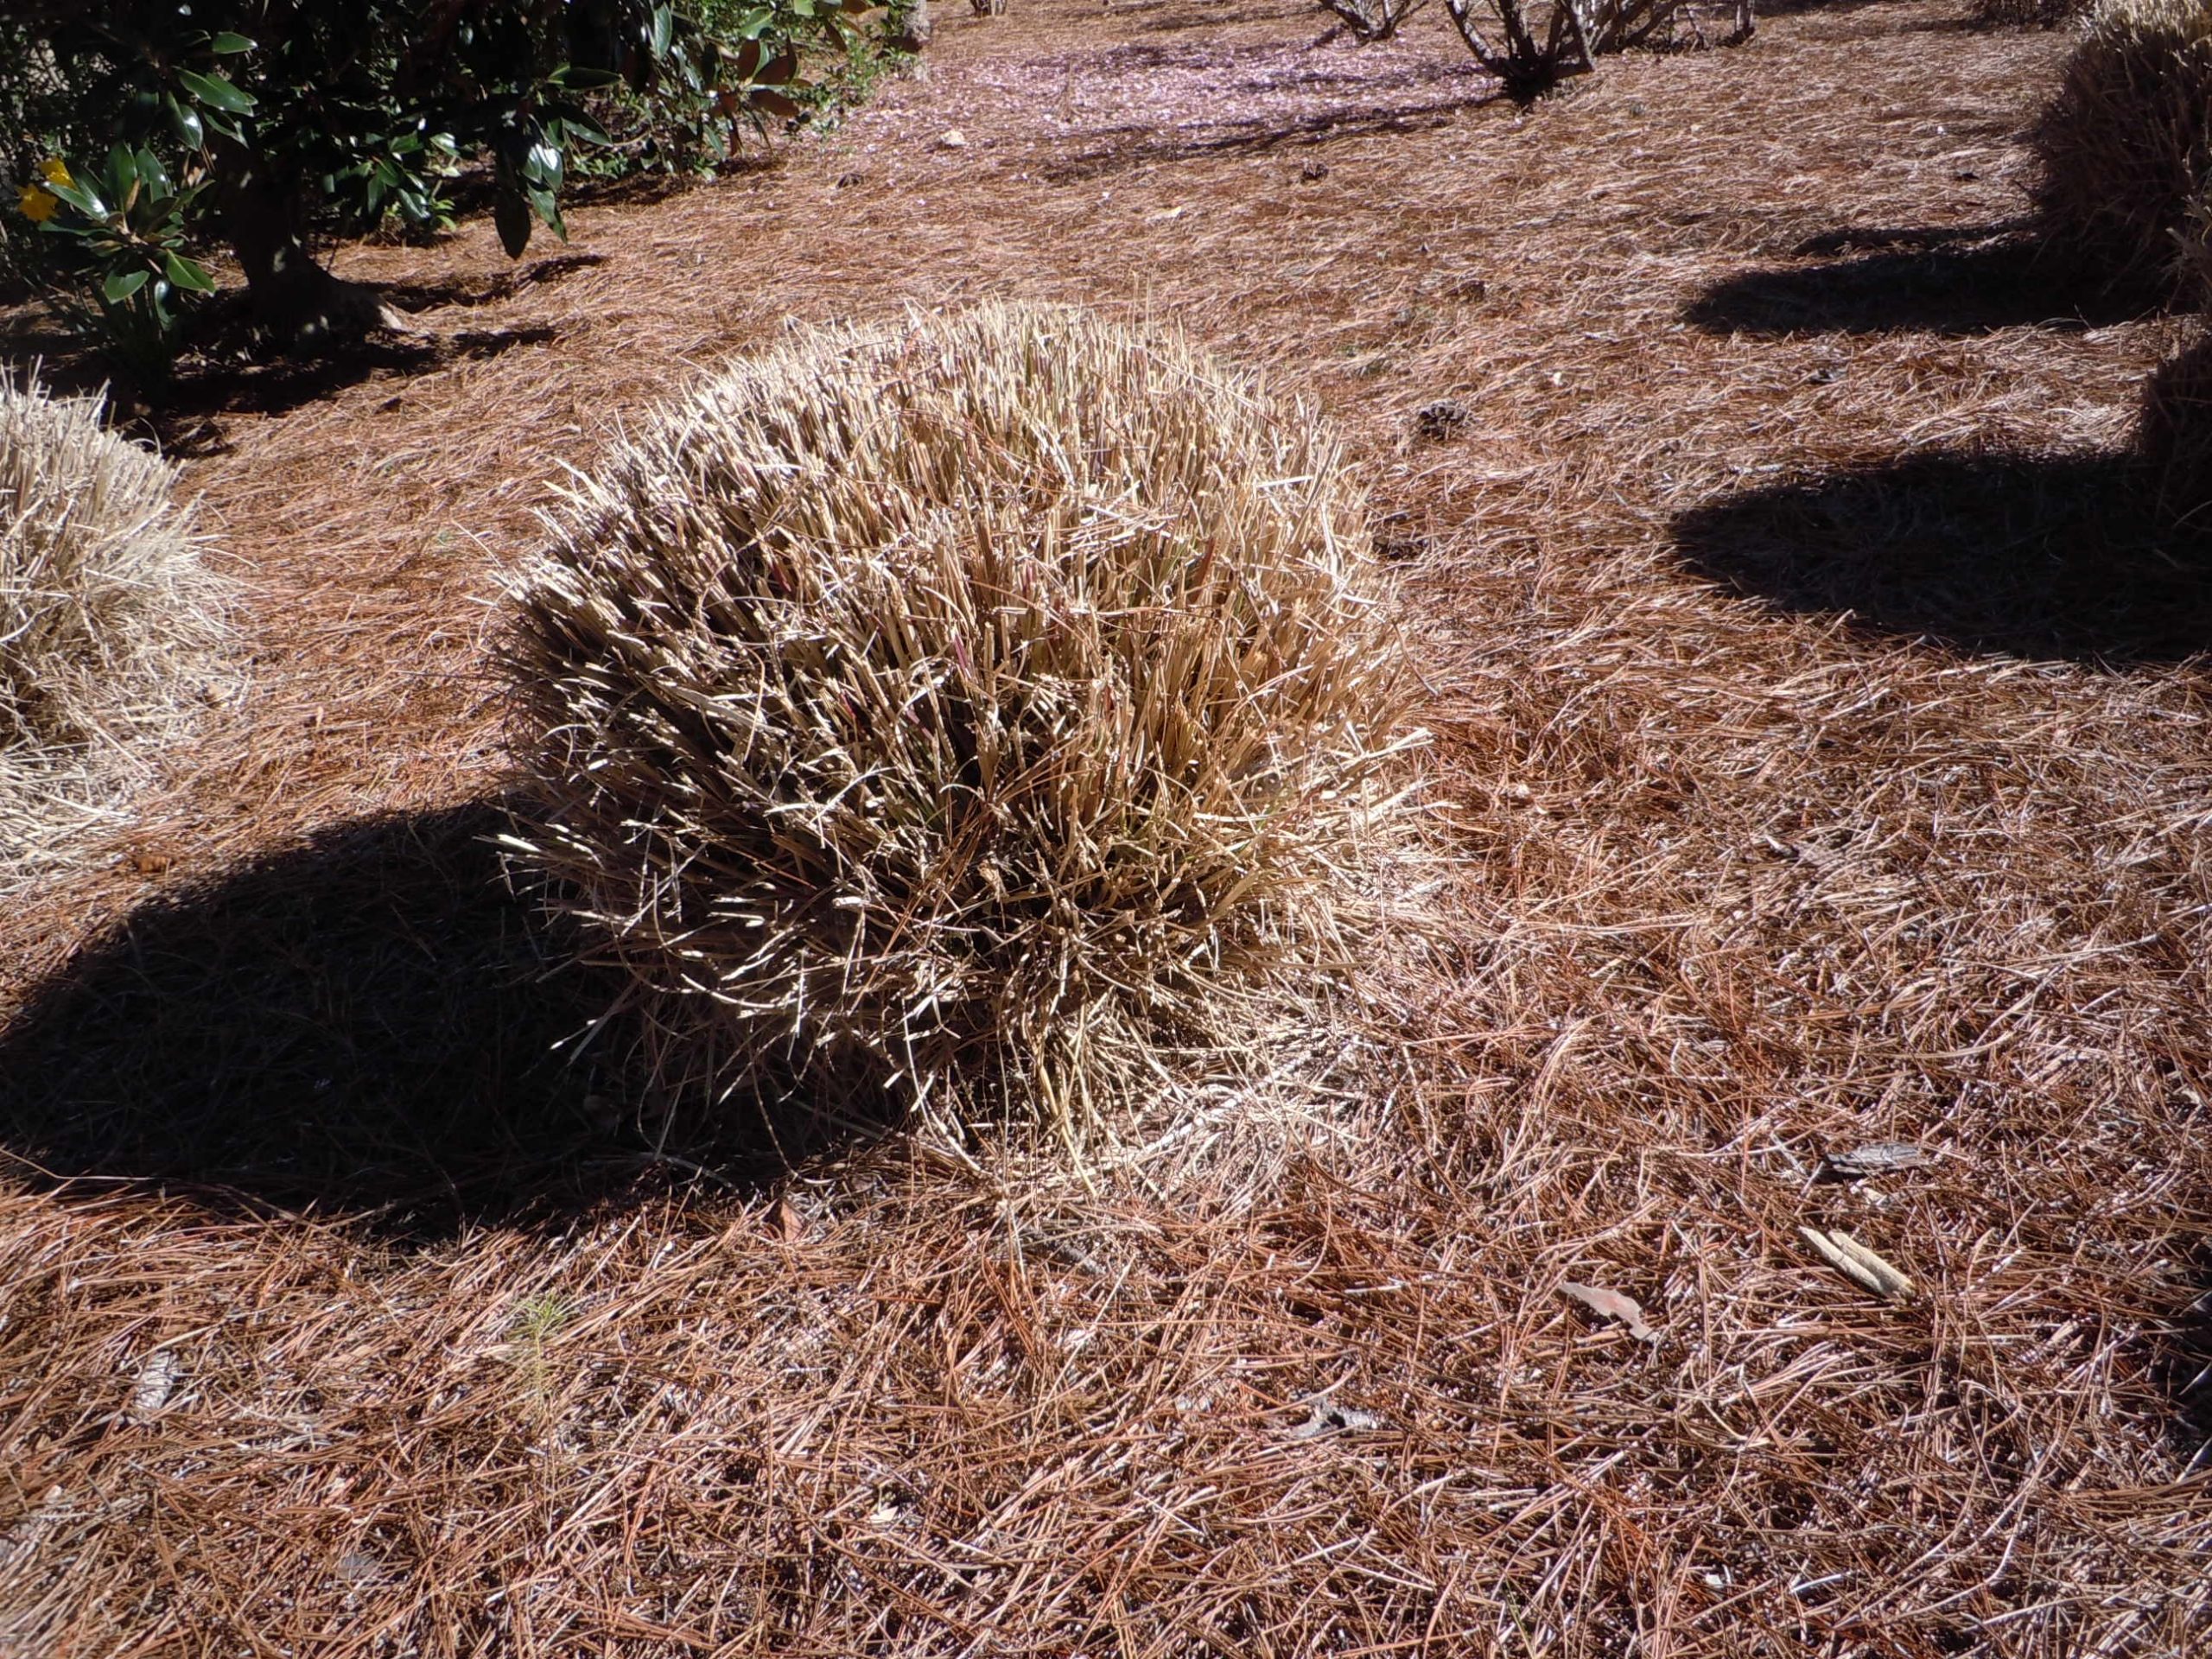
    Ornamental grasses are pruned after winter when the stems are dry and reddish.

    The size of grasses will depend on their size and decorative appeal.
    On the material side, you will need, depending on the thickness and size of the stems: a pair of scissors, a pair of shears, or pruning shears.

    • Start by pruning those that do not stand up like the blue molinie : pruning, severe, is done almost at ground level. The stems, cut into pieces, can be used as mulch. The plant will start again from the base.
    • Evergreen grasses should be pruned into a ball above the green leaves, using a sharp pair of shears. Remove dry stubble with a rake.
    • Place 2 liters of compost at the base to prepare for the resumption of vegetation.
    • For miscanthus sinensis or Chinese Reed, which is very decorative with its dry inflorescences, it is necessary to wait for the culms to break before pruning them above the green leaves using a secateurs.
    • Add a special lawn fertilizer rich in nitrogen to the foot.
    • Remember to comb the base to remove the dead leaves and finish with a ball cut.
    • For the giant miscanthus, which is comparable to bamboo in summer, pruning is done at the base for a resumption of vegetation in April. The dry stems can be used as a stake or be crushed or cut to form compost with the mown grass.
  • Choosing and planting grasses to create a massive

    Choosing and planting grasses to create a massive

    Grasses are decorative almost all year round, especially in winter at a time when the massives lack graphic design. Grasses are found all over the world, there are many decorative varieties all year round. 

    Advice before planting the grass massive

    The creation of a mass of grasses consists first of digging the earth 20 cm deep and refining the surface with a tiller to facilitate the work. Once the soil has been worked, start by placing the pots of grasses in the future massive. Place the x pots for groups of 3 or 5 identical plants to give a mass effect. The distance between the grasses is 30 to 60 cm or more depending on the adult size of the plants.

    Which grasses to choose for your massive?

    Here are some examples of grasses that will have the most beautiful effect in summer and winter in a massif. Here, a ganivelle fence (Girondine barrier) maintained by chestnut posts in the background is reminiscent of a palisade to hold back the sand and the dunes at the edge of the sea.

    • The Miscanthus sinensis ‘Kleine Silberspine’  or ‘Gracillimus’ also called Eulalie, China reed or elephant grass. This giant grass grows, depending on the variety, up to 2m50 in height. Its inflorescences in the form of silver, pink or purple plumes last all fall until the heart of winter.
    • The testacea sedge ‘Prairie Fire’ also called orange sedge is a grass whose evergreen foliage turns orange as the fall. It is said that he sets fire to the massif before winter. Its height does not exceed 50 cm. Its place is rather in the foreground.
    • Another smaller sedge this time is sedge morrowii ‘Variegata’ called Japanese sedge. Its foliage is variegated green with white central veins. Its evergreen leaves remain decorative all winter despite the cold. A grass that holds its place in front of others.
    • The Pennisetum alopecuroides ‘Hameln’ most known herb for swabs. This very compact grass 60 cm in height is surmounted by white ears with brown reflections in the form of swabs; hence its name.
    • The panicum virgatum ‘rehbraun’ (panic tapered). Although it is native to the humid prairies of the United States, it is also tolerant of drought and very cold conditions. This 80cm foolproof grass has a very light airy look. Like most grasses, it changes color with the seasons
    • The Sesleria autumnalis (seslérie autumn) is formed by a tuft of bristles within 50 cm of height. It has more of a grassy look bringing a little wild side but maintained the massif. This tuft of grass retains the soil of the steep slopes.
    • The non-tracing fargesia bamboo will not annoy its congeners. It can go up to 3 m and is easily pruned!

    Mulch the massive after planting

    Grasses are like a beautiful page of writing; it is necessary that the support is pretty and durable. It is advisable to mulch the massive with BRF (fragmented rameal wood) which prevents competing weeds from growing. It enriches the soil thanks to micro-organisms and earthworms which transform it into humus. It is possible to cover the BRF with glitter.
    Water copiously the first time to empty air pockets around the root ball.

  • Carex EverColor series (Carex oshimensis): cultivation

    Carex EverColor series (Carex oshimensis): cultivation

    This series of grasses offers different foliage that illuminates every corner of the garden: lemon yellow with ‘Everillo’, yellow edged with green with ‘Eversheen’, green striped with cream with ‘Evergold’ or ‘Everlite’…

    Characteristics

    Soil: indifferent
    Spacing: 40 to 50 cm between 2 plants
    Planting: from March to May or from September to October
    Flowering: in May
    Exposure: sun, partial shade or shade
    Use: bed, pot, container
    Height: 30 to 40 cm

    Culture

    These undemanding grasses , with evergreen foliage with graphic effects and varied colors, provide structure to beds, planters and pots. Depending on the variety, they like the sun, partial shade as well as shade. Adapt the varieties according to the ground and the exposure.

    The sedges of the EverColor series are planted in the spring or fall, in the ground or in a container. The type of soil is indifferent (acidic, limestone, acidic, neutral), because they are not demanding.

    • Dip the cups in a bucket of water to bathe them, facilitate the removal of the clods and dissociate them. 
    • Prepare planting holes at the height of the root ball, then place the root balls at the bottom of the holes.
    • Fill in the gaps with garden soil or a “special planting” soil.
    • Firm the surface then water.

    If several feet of sedge are planted, make sure to space them 40 to 50 cm apart, or even more depending on the desired effect: the sedges spread out about 40 cm throughout their culture.

    EverColor sedges require very little care. They only need to be divided every five or six years to multiply the feet and prevent them from running out.

    Use

    In spring, tulip, grape hyacinth or narcissus bulbs, as well as primroses, mix with sedge to bring color to their amazing foliage. All summer long, they bring lightness and graphics to perennial and annual beds, as well as to flower arrangements. In a rock garden or a dry garden, sedges work wonders! Planted by dozen in a bed, their foliage is always in motion. With yellow or red horns, the decorative aspect of their foliage will only be amplified! Together with begonias or SunPatiens impatiens , they make magnificent flower boxes in bloom all summer.

    Carex associations EverColor series

    Bright and colorful border

    The round shape of Carex EverColor ‘Everillo’ (1) is used to underline an aisle border, while giving it exceptional luminosity thanks to its very surprising lemon yellow color that blends perfectly with the flamboyant little side of a row orange-yellow rudbeckias (2) in the background. Between each rudbeckia plant, ‘Mystic Spiers’ sage plants (3) have been added to create a very interesting contrast of colors and shapes. The round rudbeckia flowers pair beautifully with the long stems with deep blue spikes of this variety of sage. The latter, by its verticality and its color, thus becomes a perfect setting for the sedge ‘Everillo’, for a scene as bright as it is harmonious.

    Foliage and touches of color to brighten up the balcony terrace

    On a terrace or balcony, the very graphic silhouette of the Carex oshimensis EverColor further emphasizes the contemporary side of a tall, geometric-shaped hotpot. The variety ‘Everest’ (1) is chosen here for its clear green foliage edged with white, which perfectly tolerates the pink tints sometimes difficult to associate with a Petunia Easy Wave ‘Pink’ (2) planted at its foot. Next to it, a white Cabaret calibrachoa (3) cascades down the wall of the pot, while in the background a nandina ‘Sensation Twilight’ (4) with foliage speckled with white and pink gives even more charm to this composition. In summer, this exceptionally robust shrub is covered with starry white flowers that will blend gently with those of the petunia.

  • Divide a bamboo in a bin to replant it in the garden

    Divide a bamboo in a bin to replant it in the garden

    A bamboo tub divides when the new canes are smaller than the old ones, despite watering and fertilizer applications. This is a sign that the bamboo is getting tighter and tighter in a pot that is too small.

    The division of rhizomes takes place in autumn or spring before the appearance of new spears.
    Water the bamboo copiously to facilitate stripping.
    Start by preparing the planting holes while the tray moistens itself quietly to the heart of the root ball. Previously the ground was covered by a thick layer of BRF (Bois, Raméal, Fragmenté).
    The stripping is delicate because the rhizomes compress the tray preventing the extraction of the bamboo. No need to insist, the risk would be to deteriorate the plant.

    Deposit the bamboo

    Bamboo is grown in a seamless zinc tub. Spread the pot without damage with a chisel to remove the bamboo.
    The roots are very compacted and occupy the entire tank. However, the drainage allowed the bamboo to remain healthy. The roots are healthy.

    Cut the root ball in four

    A handsaw is essential to divide the roots into 4 equal parts. The bamboo can be cut like a cake, starting from the bottom up.
    Bamboos appreciate slow-release organic fertilizers rich in nitrogen. Dry blood is very suitable as a bamboo fertilizer.
    Place one of the 4 parts on the substrate and fill the hole with compost mixed with the extracted soil.
    Pack then water copiously.

    Good to know

    Here it is largest, a non-tracing bamboo that does not require an anti-rhizome barrier. If in the future the bamboos take up a little too much space, it is possible to divide them and obtain new plans to make a small hedge that is easy to cut.

  • Everything you need to know about bamboo in the garden

    Everything you need to know about bamboo in the garden

    Explanation on the maintenance of a bamboo hedge and the control of the invasive progression of bamboo in the garden. 

    How to prune bamboo to have a very dense hedge?

    It is imperative to prune a tall bamboo hedge only once a year. But for that, it is necessary to wait for the end of the growth of the new canes (leaves appear at the top), otherwise, the operation would have to be started again a few weeks later.

    When the canes are too tight, new bamboo canes grow tall and only leave leaves at the top. This prevents densification of the hedge in its lower part.

    At the end of winter, carry out a thinning pruning :

    • Clear the inside of the clumps, cutting off at ground level the oldest stems that have dried out or those which are more than 4 to 5 years old, but which still bear leaves.
    • This last intervention leaves room for new rods which develop and expand where they have enough light.
    • Complete this cleaning by adding organic nitrogen fertilizer or a layer of ripe compost.

    How to stop the progression of bamboos which threaten the pipes in the garden?

    Removing the bamboo rhizomes is very difficult, especially if it is a Phyllostachys bamboo, very tracing and sinking into the ground. 
    The only solution is to surround the bamboo with an anti-rhizome barrier to protect the pipes from bamboo rhizomes.

    To circle the bamboos: 

    • Dig a 70 cm deep trench to slide in a  non-woven geotextile anti-rhizome barrier, made of 100% polypropylene.
    • Position the canvas along the wall. For information, the bamboo roots turn clockwise: at the junction of the circle, cover one piece of tarpaulin with the other so that the roots do not slip through.
    • It is also possible to bury corrugated sheets vertically.

    To stop the progression of bamboo in the garden, you must: 

    • Break the spears as they come out of the ground. Exhausted, they end up getting discouraged.
    • In addition, repeated passages with the mower slow down their progress.

    For information, beware of voles or mole rats, which feed on the rhizomes. They cut them up and transport the pieces over several meters. Bamboos are then cuttings everywhere. 

  • Culture sheet: miscanthus giganteus, a giant grass

    Culture sheet: miscanthus giganteus, a giant grass

    As imposing as bamboo, but without the inconvenience of sucking, Miscanthus giganteus is a giant grass, ideal for hiding an unsightly place.

    If I knew the existence of this plant, I had never looked into its qualities, before having a wall to hide. A neighboring wall is in the process of being mounted on the edge of the garden. A wall that I was not allowed to invest with a climber, since it did not belong to me. During a stroll in the garden of Lepage Bord de mer (22), in the middle of winter, I took a secret path, a corridor rustling with a thousand thin and gigantic leaves. I took myself to Alice in Wonderland, in the middle of these golden rods reaching up to the sky, almost four meters from the ground.
    When the wall in my garden was finished, I remembered this plant which, after three years, takes its place, without exceeding one square meter on the ground.
     I planted a few shrubs, persistent and deciduous, to brighten up this partition with the seasons, even in winter, and, between each, I installed a base of miscanthus giganteus. Its ears and dry leaves persist throughout the winter. In March or April, I cut back the old stems when the new ones arrive. This tuft is very moving, flexible, and I forget the party wall. The dark green leaves, 25 mm wide, curl, giving the impression of a waterfall when it is windy. In May, I sow volubilis at their feet which cling to them, climb and flower them. I even installed a passion flower which clings to it, flowers and fruits in the middle of these canes. And, in the fall, when the flower spikes form, silvery and pinkish, dancing in the sky.

    Simple to grow

    Very hardy, miscanthus giganteus grows everywhere, in all good soil, where there is sun. Make a 40cm hole in all directions, bring compost to the original soil and plant it after soaking the root ball for a few minutes in a bucket of water. If it can compose a compact hedge to structure the garden – to be spaced every meter in this case -, it nicely dresses a background of massive. I also like it installed in a large pot, on the terrace, where it plays with the wind all the time. We gladly forgive him the two months when the tuft is bare, in March and April, between the time when we cut the old canes and the arrival of new ones.

    Salvage: stakes and mulch

    When you cut the stems in early spring, use them as stakes to hold tall perennials. As for the leaves, they make an excellent mulch in the beds, preventing unwanted grasses from settling.

    Farmers and industry are interested …

    The composition of the fiber makes it possible to manufacture biofuels and biofuels, paper, cardboard, animal litter, composite panels, insulation panels, among others …

  • How to water broccoli: tips and method

    How to water broccoli: tips and method

    Broccoli needs cool, moist soil. During its installation, at the time of the first heat, mulching the broccoli promotes good water management by the soil.

    The water needs of broccoli

    Broccoli has average needs and suffers as much from lack of water as from excess watering. Mulching can be helpful to prevent evaporation and promote broccoli growth.

    Signs of Broccoli Lack of Water

    Broccoli color fading. 

    Water quality

    Cabbage has no special requirements. It does not like water with an acid PH (in general, water, even recovery water, is not acidic).

    Necessary equipment for the jet broccoli

    Watering can. Broccoli prefers precise watering by hand to prevent its foliage from getting drips.

    How often do spray broccoli

    After transplanting, water once or twice a week to keep the soil cool and moist, peaking at two or three during really dry spells. Once mature, jet broccoli needs less water: a weekly watering will suffice.
    Water preferably at night, late in the evening, or early in the morning.

  • What are the benefits of reeds in the garden?

    What are the benefits of reeds in the garden?

    Common reed ( Phragmites australis ) also called broom reed, broomstick or marsh reed is a perennial plant that inhabits the shallow waters of ditches, lakes, or ponds. It is found everywhere in humid areas.

    reed culture sheet

    The common reed is part of the Poaceae family formerly called the grass family. Although it is considered an invasive plant, it disappears with the drying up of wetlands.
    According to La Fontaine’s fable The Oak and the Reed, the reed bends but does not break.
    The broom reed is a large plant, 2 to 4 meters in height, with a single upright stem. Its flexible gray-green leaves form a sheath around the stem at the base.
    Its flowers are long panicles of 20 to 30 cm first erect and then tilted after flowering. The purplish-brown ear or spikelet is covered with long silky white hairs.

    How to multiply the reeds?

    Like bamboo, the reed has a root system with rhizomes which is sometimes very invasive. Multiplication is therefore done by division of rhizomes in spring until early summer.
    Choose a sunny and humid location, preferably clayey soil, but the reed can grow anywhere as long as it keeps its feet in the water.

    How to create a reed bed in a water point?

    The creation of a reed bed requires a water rise of 10 cm to 80 cm is necessary for winter.
    In spring, the feet are submerged up to 30 cm in height which stimulates their development. Dry soil during the summer is fine for it as long as the soil remains moist.

    How to maintain a reed bed?

    The stubble is mown flush every other year, from October to January. The extraction of crushed stubble makes it possible to mulch trees and shrubs which then turns into humus.

    Why plant reeds?

    • Reed beds are home to dragonflies, amphibians, fish, birds, and mammals from predators, and more particularly during reproduction.
    • The reeds fight against water pollution in aquatic areas.
    • The roots filter the surface water by self-purification.
    • Some municipalities use reed beds for wastewater treatment.
    • The reed beds serve as spawning grounds for fish and amphibians.  
    • Reeds are used for thatched roofs and serve as thermal insulation and soundproofing.

    What does the law say about reed beds?

    It is forbidden to fill the reed beds with rubble, burn the stubble, or clear them.