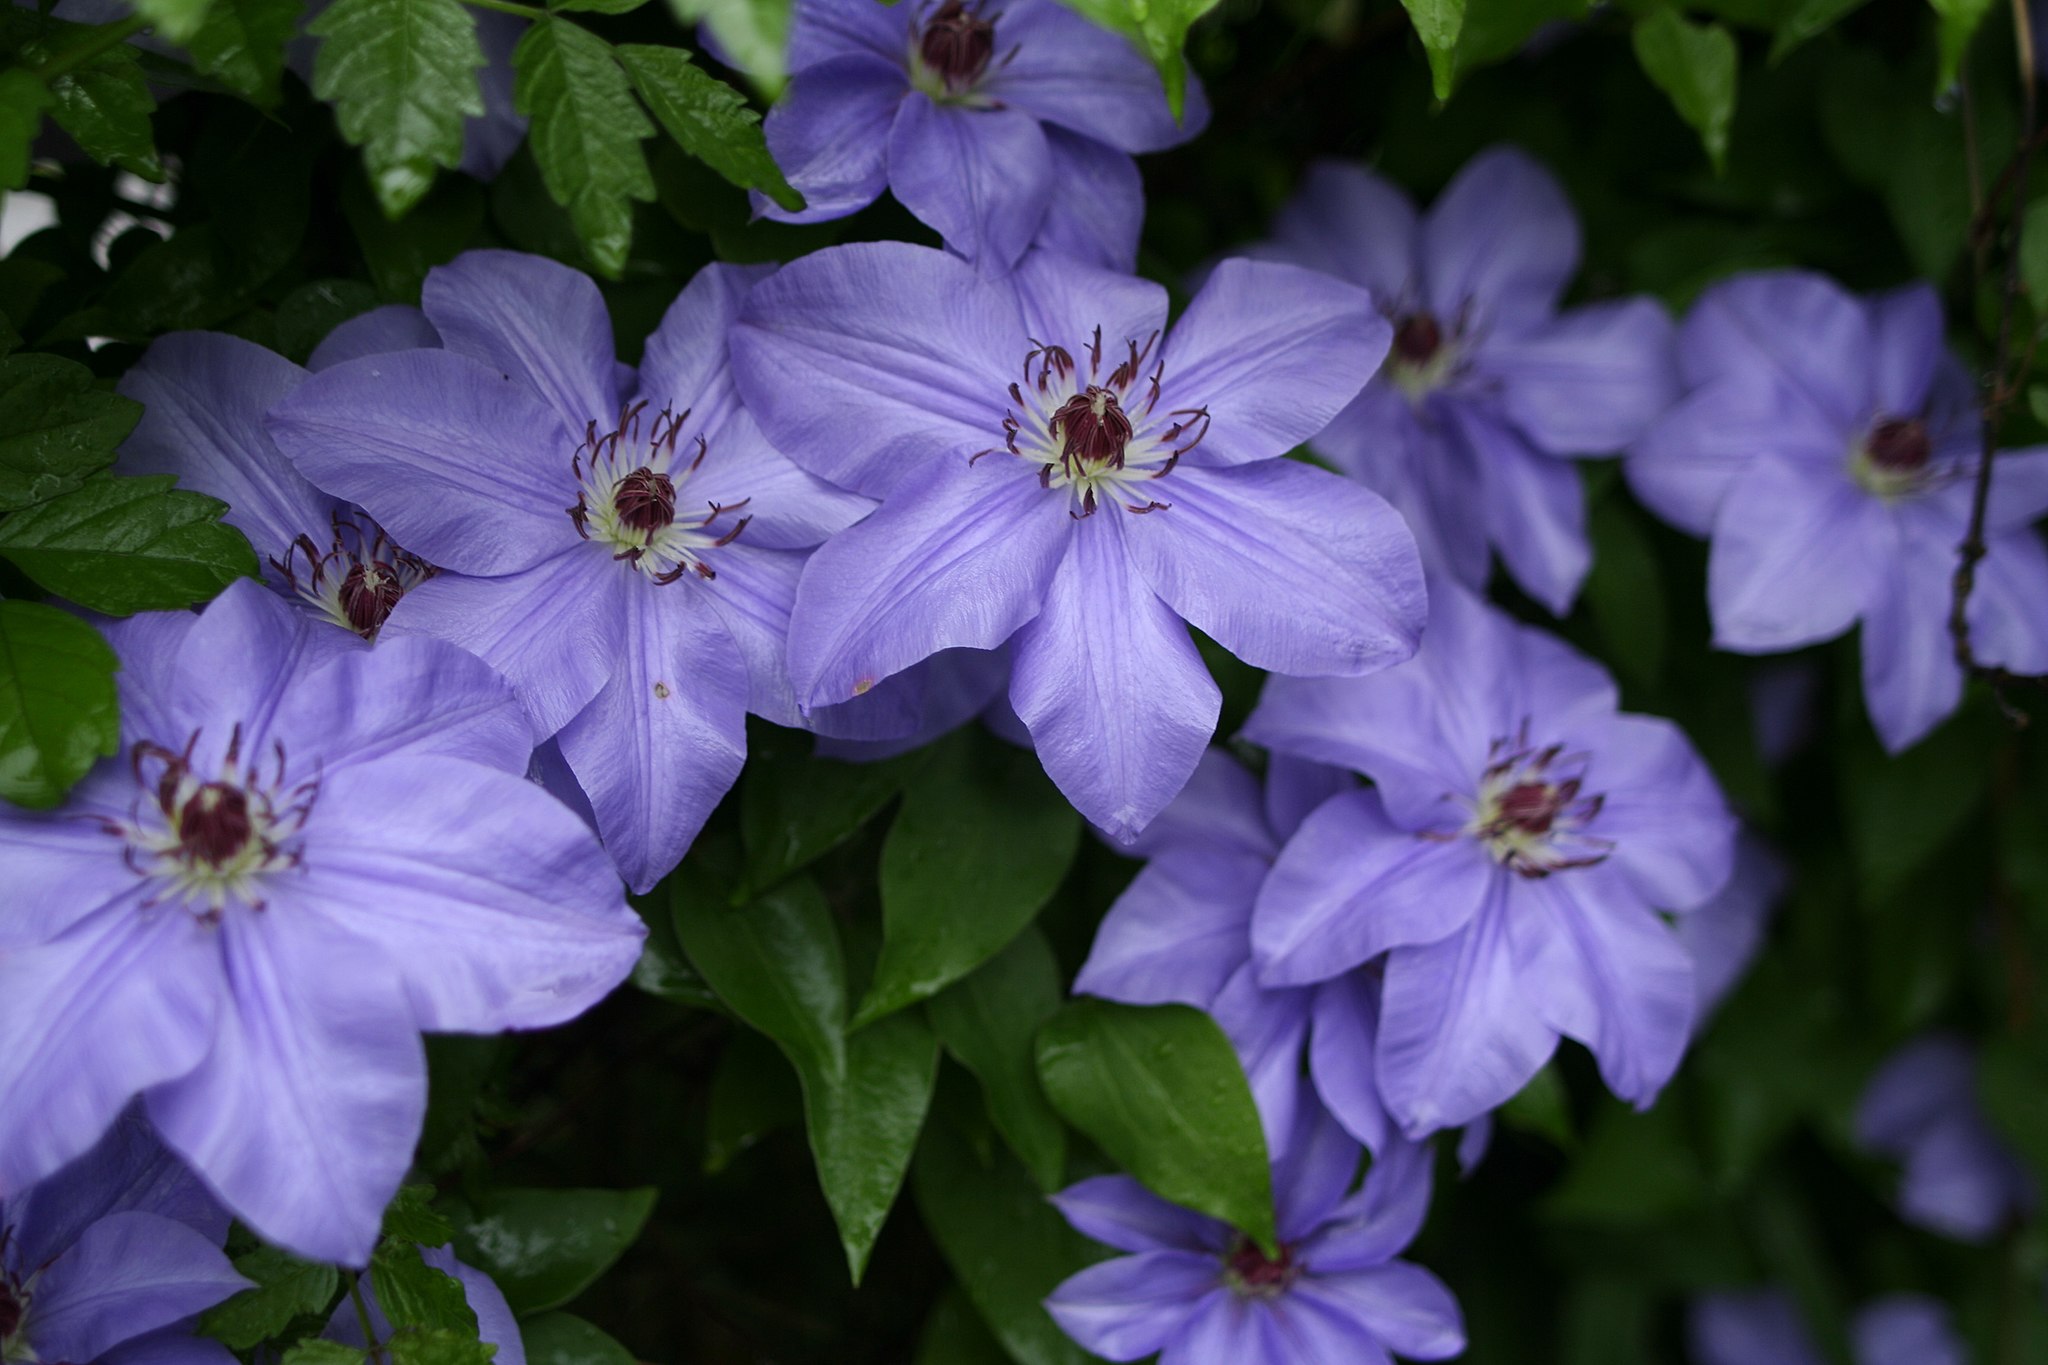
Choosing plants adapted to the climate and the nature of the soil is to give them the best conditions to flourish. Selection of climbing plants to install in a garden with an attenuated oceanic climate.
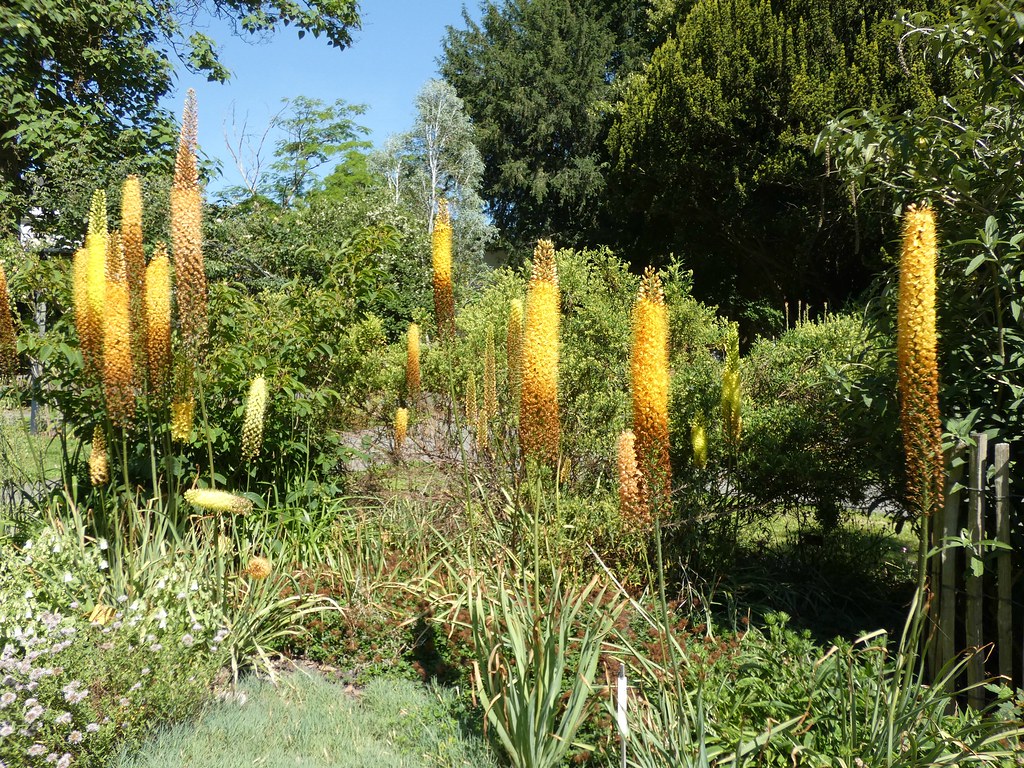
The long spring spikes of this perennial are held together by fleshy, claw-like roots. When the feet become too old, it is necessary to carry out their division.
Material: fork-spade prong hook watering can with apple
Advice: Avoid overwatering the soil before division, so as not to have a clod of earth too sticky around the roots.
Good to know: The division of the claws of the Eremurus is the best way to multiply this plant, the sowing being very difficult to achieve.
Cut the stems and dig up
After flowering, when the foliage of ermurus wilts, cut the stems low to the ground. With a fork-spade lift the plant and lift it completely out of the ground. Place the tool far enough from the clump so as not to damage the roots.
Cut the damaged roots
Then shake the clod to drop the soil that adheres to it. You must clearly distinguish all the roots to be able to divide them easily. If there are portions of damaged roots, cut them cleanly with a knife.
Separating the claws of the eremurus
Then proceed to the separation of the claws forming the roots, making sure to keep, on each portion, one or more buds that will produce the new leaves and flowers. If the separation is difficult, cut with the billhook.
Replant the young claws
Immediately replant the young claws, in a soil well prepared with a hook and free of weed roots. Just make the bud flush. Tamp all around with your hand and sprinkle in a fine rain so as not to uncover the claw.
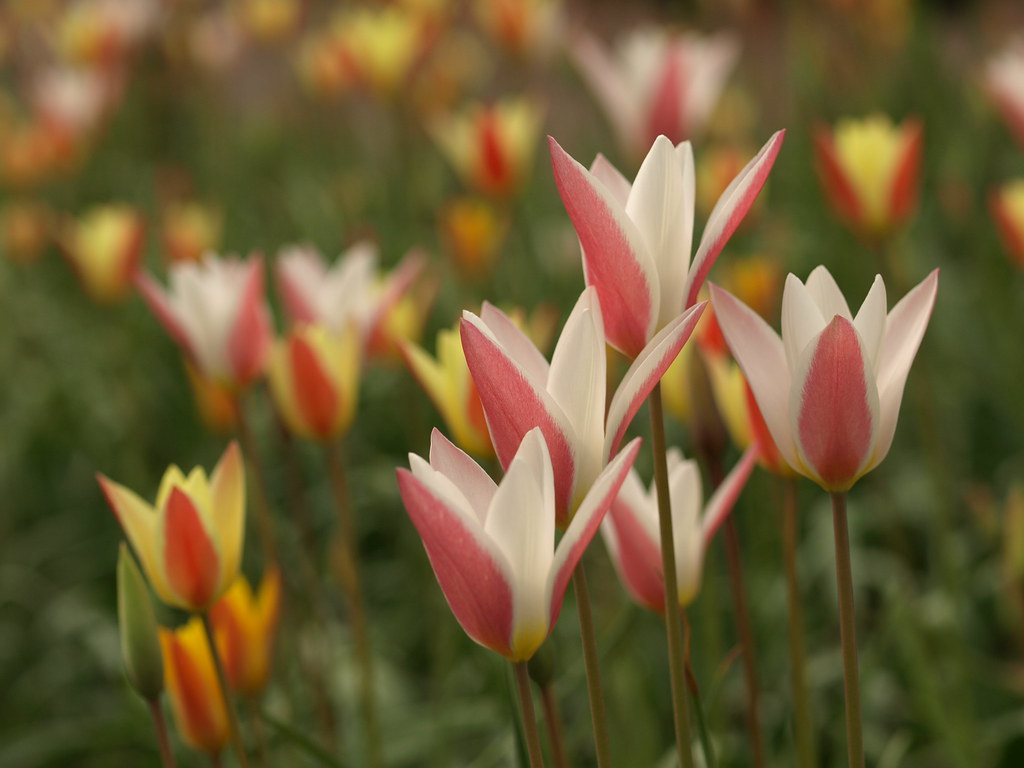
Or Lady Tulip, as the Anglo-Saxons call it, is undoubtedly the most refined and delicate tulip there is! It is also one of the tulips whose historical aspect proves to be the most fascinating, and it is undoubtedly one of the tulips of the flora of France among the most precious. But which tulip can I refer to you are probably asking? Look no further, it is Tulipa clusiana !
A trip to the past
The beginnings of the history of our plant go back to a very distant time! Indeed, it was at the beginning of the 17th century that Charles de l’Ecluse (1526-1609), alias Carolus Clusius, received the first few bulbs from Persia. He succeeded in making them bloom in April 1607. Note that this first flowering in cultivation enabled him to carry out the first detailed description of our tulip!
Taking into account the region of origin of the bulbs in his possession, he naturally chooses to baptize it Tulipa persica, which explains why it appears under this name in the herbaria created at this time. We will have to wait until 1803 for Augustin Pyramus de Candolle (1778-1841) to provide a new description, definitive because it is much more convincing. He took the opportunity to name the species in memory of his predecessor, Charles de l’Ecluse.
The natural range of Tulipa clusianais so vast, it includes Iran, Iraq, Afghanistan, Kashmir, but also the Himalayas and Tibet, that there spontaneously exist several different forms. These are distinguished in particular by colors, but also by slightly different dimensions. Subspontaneous, the species is also present in many regions of the south of France. Greatly threatened, it also benefits from total protection throughout the territory!
In the garden
Although medium in size and slender in appearance, Tulipa clusiana is particularly hardy. The success of its culture meets the same requirements as those required for Tulipa batalinii : a sunny location and a well-drained soil, dry in summer. Because it is a very stoloniferous species, it is wise to offer it a quiet (unworked) and permanent location, so that it can colonize as it pleases all the available space. At best, it will end up building up a relatively large population there, which will further increase its appeal.
I can guarantee you that I will never forget the spectacle of a population of several hundred flowering individuals that I was given to admire a few years ago. In short, this is the ideal species for those who wish to cultivate a natural garden…
Despite its status as a protected plant, the typical form of Tulipa clusiana, with the remarkable white and red flower housing an unexpected purple heart, has been in cultivation for decades, which allows it to be sometimes offered for sale. It is important to remember that the simple fact of introducing a few of these bulbs into a garden is a significant act, allowing everyone to make a concrete contribution to safeguarding biodiversity!
Of course, this does not mean to deprive oneself of other natural forms of the species and even less of the superb horticultural varieties obtained over the past few decades …
Other natural forms
Tulipa clusiana var. chrysantha has a dark yellow flower touched on the outside with red. It is a very common plant, frequently offered in the traditional horticultural trade.
Tulipa clusiana var. stellata . Identical to the typical shape. However, she does not have a purple heart. It is frequently biflorated, a true collector’s plant that should not be confused with ‘Lady Jane’ (see below).
Varieties obtained in cultivation
Tulipa clusiana ‘Tinka’. We have here a variety with yellow and red flowers with a very clear design. To grow in a large group. Ideal for constituting original bouquets.
Tulipa clusiana ‘Tubergen’s Gem’. With its remarkable dark yellow and red flower, here we have the variety whose flower displays the most intense colors. A must !
Tulipa clusiana ‘Lady Jane’. Unparalleled elegance, it wears a white and pink flower, and deserves to be kept in isolated groups, even in clumps if these are composed of flowering plants of soft tones. In any way, his extreme delicacy could not rub shoulders with vulgarity.
Tulipa clusiana ‘Peppermint’ looks very similar to the type form. However, its colors appear a little more contrasted, the plant stronger. As such, I would like to point out that the horticultural varieties are generally a little larger than the natural forms!
To finish, I strongly advise you to install Tulipa clusian a and its varieties in groups rather than in rows (this method of in-line planting, if it is ideal for leeks, is on the other hand unflattering for tulips. ). To do this, when planting, simply arrange them in a circular fashion in the bottom of the hole. In addition, the tuft thus obtained will grow larger each year.
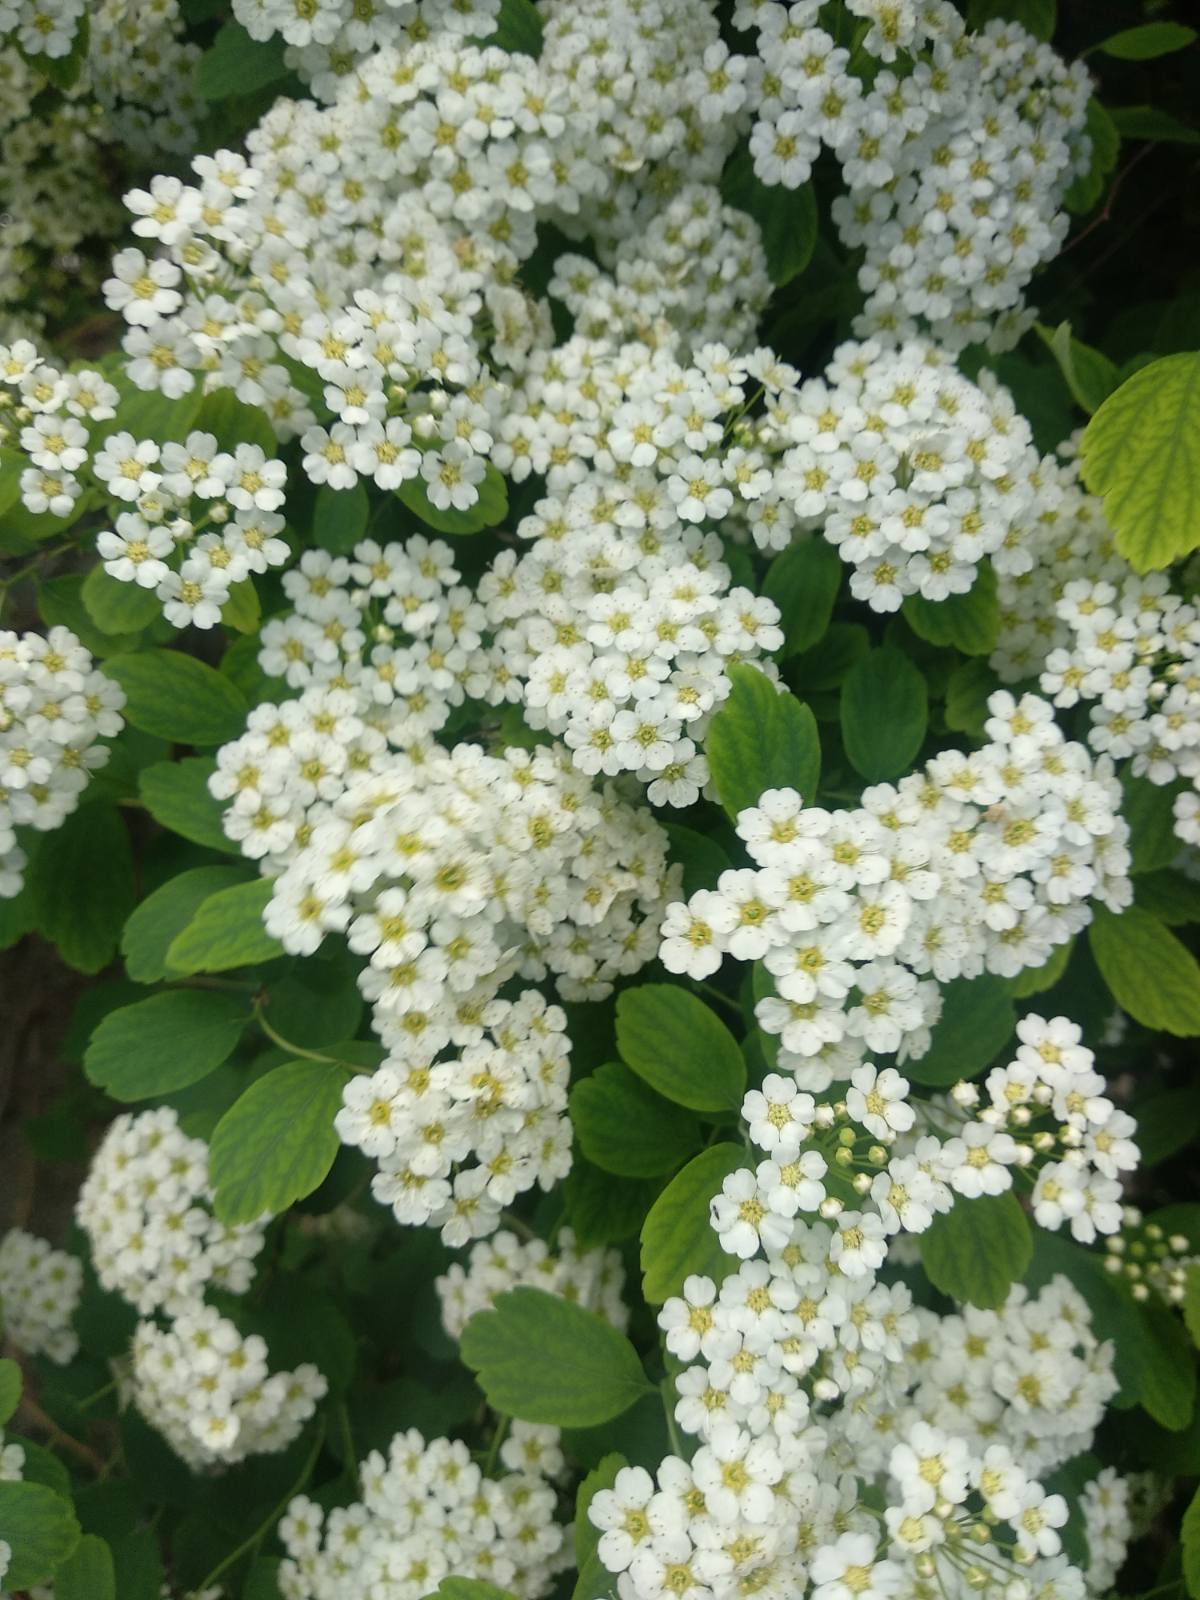
Spirea comes in variable sizes , depending upon cultivar Typically 2 to 3 feet high and 3 to 5 feet wide, but some cultivars can go up to 5 to 6 feet high and wide. Falls into two categories, spring-blooming and summer-blooming with white or carmine-pink flowers
Tree & Plant Care
Compact, mounded shrubs Requires well drained soil, intolerant of wet sites. Best in full sun, but many will grow in light shade. All spirea benefit with a periodic pruning to to keep plants in shape and initiate new growth. Can be cut to the ground and will grow back from the roots. Flowers on new wood, prune in early spring; pruning after flowering often will promote a second sporadic flush of flowers. Tolerant of aerial salt spray
Leaf or needle arrangement, size, shape, and texture
Alternate, simple leaf, 1 to 3 inches long and 1 to 2 inches wide, serrated or toothed leaf margins. Depending upon cultivar, new leaves emerge reddish-orange or with a pink tinge, changing to medium green for summer and back to a orange-red fall color.
Flower arrangement, shape, and size
Flowers on new wood. Most are summer blooming, but a few cultivars bloom in spring. Flowers are 3 to 4 inch, flat clusters (corymbs) of white to deep pink in June through August.
Fruit, cone, nut, and seed descriptions
A dry, brown follicles, persistent through winter, not ornamentally significant.
Available in a wide array of cultivars, Japanese spirea offers the most variety in terms of size, flower color, and leaf color. It produces abundant clusters of white, light pink, rosy red or purple flowers that adorn the branches in late spring and summer. Sizes range from dwarf types, such as ‘Little Princess’, to larger shrubs that grow to 5 feet or taller. Most varieties have finely textured green or blue-green leaves, but some cultivars have yellow or chartreuse foliage that changes color throughout the season.
When to plant:
Spring or fall
Where to plant:
Make sure you have chosen a site that drains well and receives at least 6 hours of sun each day.
How to plant:
Dig a hole that is twice as wide as the container and just as deep. Remove the plant from its container and gently loosen any tightly wound roots. Place the plant in the hole and backfill with the excavated soil. Water thoroughly to settle the soil. Cover with a 2-3” layer of mulch, keeping it away from the stems.
Spacing:
Space spirea plants 2 to 15 feet apart, depending on the expected mature width of the plant and the application. To create dense, full spirea hedges, you can space your plants more closely together as long as you give them some elbow room.
SPIREA CARE
Fertilizing:
Spireas are not heavy feeders, so they’ll do fine with an application of controlled-release fertilizer in early spring, which should provide enough sustenance for the entire growing season.
Watering:
Keep newly planted spireas well-watered until they become established. Mature spireas are drought tolerant and only need watering when the soil becomes dry. Spireas don’t like wet feet, so avoid oversaturating the soil.
Pruning spirea:
Don’t hesitate to give spireas a liberal pruning, if needed, to maintain their shape and to remove dead or broken branches. This is best done in late winter or early spring while your plants are dormant. Giving spireas another lighter pruning after they bloom in spring or early summer will promote new blooms and reinvigorate foliage growth. Because spireas are fast growers, they will recover quickly.
Pests and diseases:
Spirea generally aren’t bothered by any serious pest or disease problems. However, they are related to roses and can be susceptible to the same pests and diseases as roses, such as leaf spot, powdery mildew and aphids.
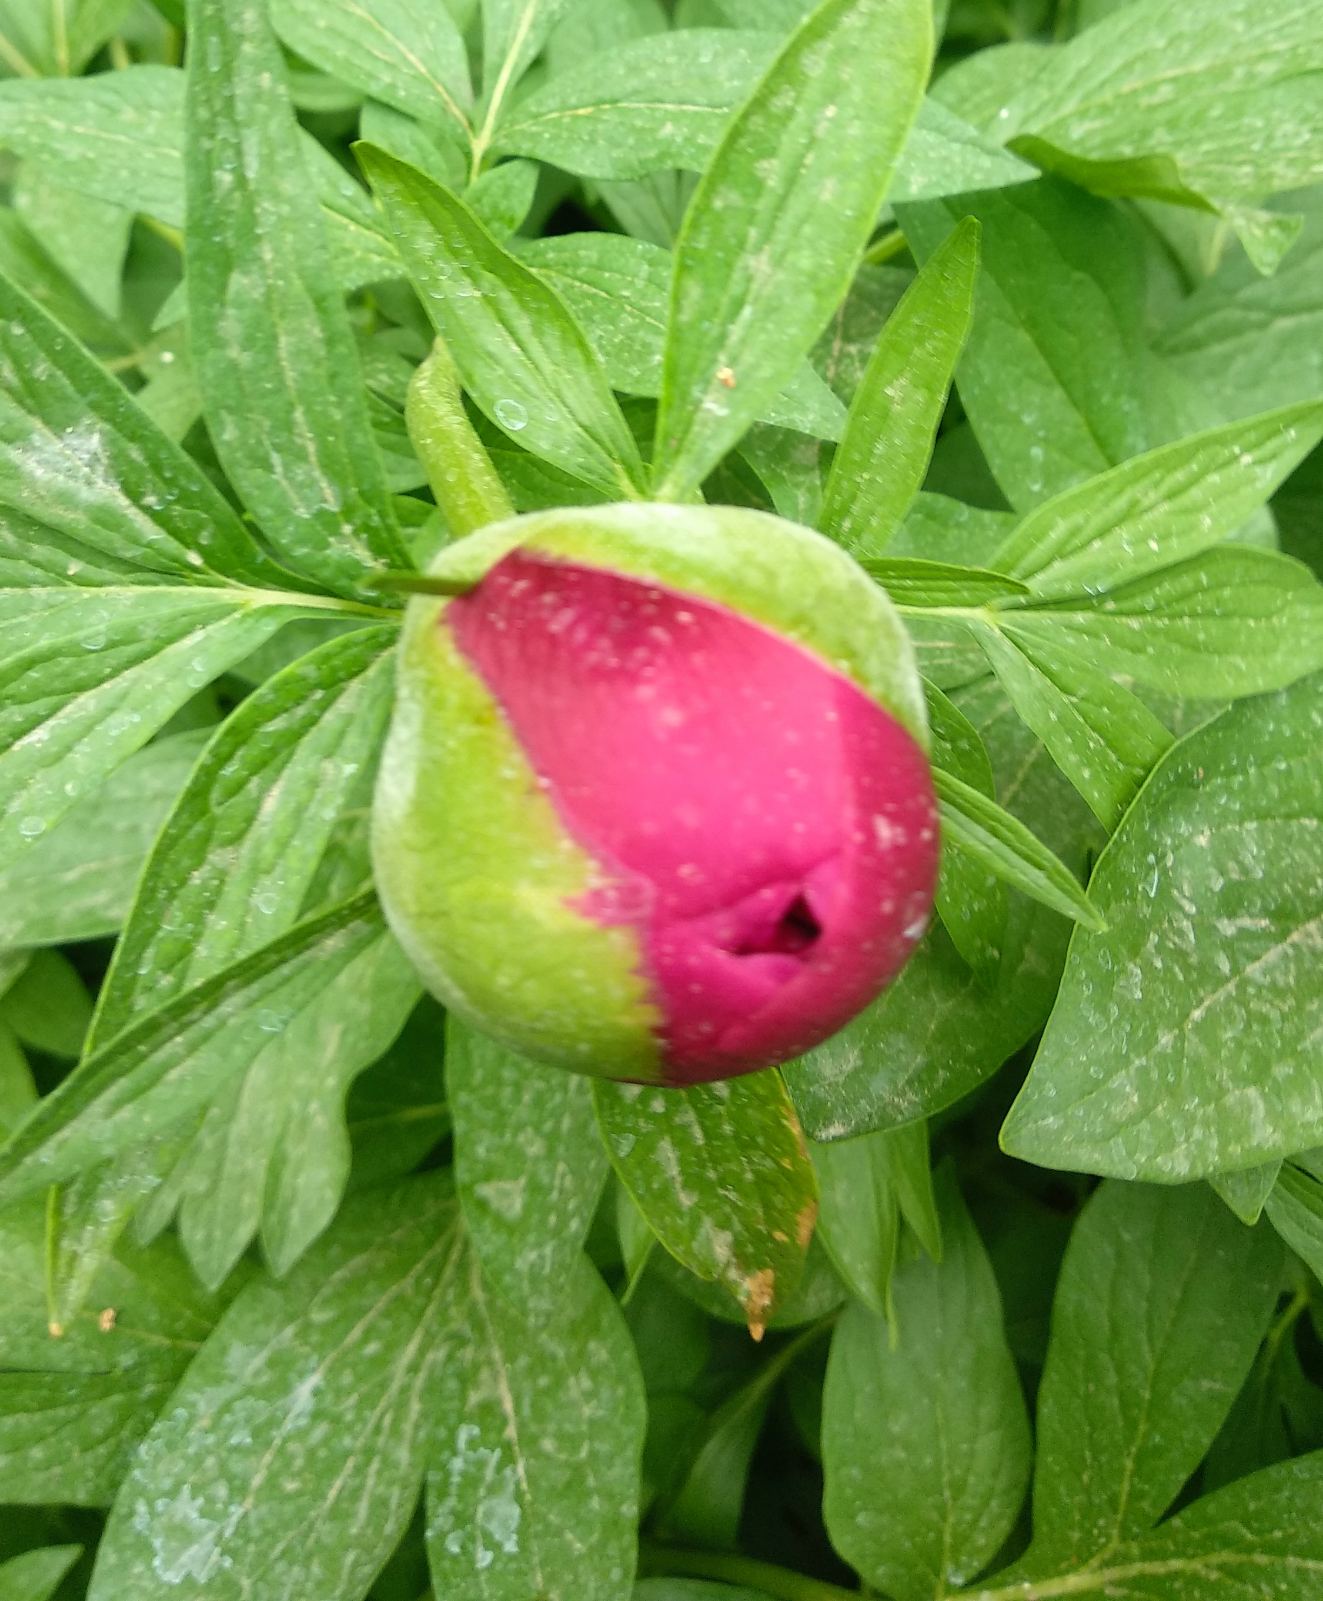
There are three types of peonies: herbaceous (bush), tree and Itoh (intersectional). Compare them in detail here: Types of Peonies.
Height/Spread:
Herbaceous and Itoh varieties grow 1 to 3 feet tall, with a similar spread, while a mature tree peony can reach 4 to 7 feet tall and 4 to 5 feet wide.
Exposure:
Most peony plants are sun-lovers. However, tree peonies prefer light shade during the heat of midday, which encourages the blossoms to last 10 to 14 days, rather than fading quickly (two to three days) in full sun. In China, parasols are enlisted to protect the delicate flowers from sun.
Bloom Time:
In most locations, flowers will bloom in April, May or June. Expect tree peonies to bloom first (around Mother’s Day), followed by herbaceous varieties (around Memorial Day) and then the intersectionals. Include all three types in the garden to enjoy blooms for up to seven weeks.
Flower color:
Colors range from white, pink and red to coral, maroon and yellow. Many peony flowers change color as they open, so make sure to check them daily to appreciate these differences.
Fragrance:
Many peony flowers are fragrant. Scents can differ—some are scented sweetly, some have enticing citrus smells, and some are described as slightly spicy.
Pests and diseases:
Fortunately, they are deer and rabbit resistant. Unfortunately, they are susceptible to botrytis blight, a fungus that can cause young shoots to rot, unsightly spots on leaves, and prevent flower buds from developing. Good air circulation around your plants will help prevent fungal diseases. Learn more about issues that can arise in the Missouri Botanical Garden’s guide to peony problems.
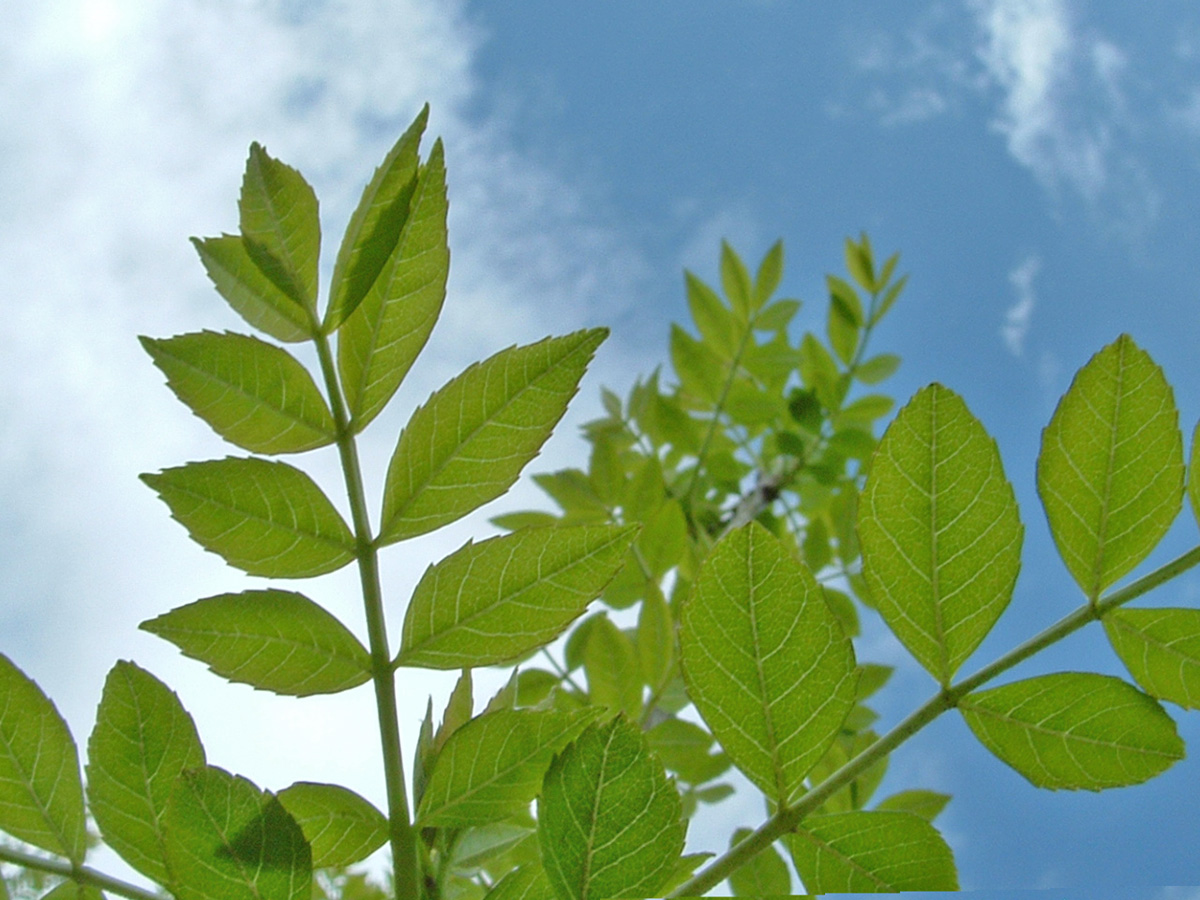
Young ash plants do not transplant from the first winter. If they are too tight, thin out the seedlings sown in the nursery.
When to thin ash?
If you do not want to recover the removed plants, the thinning of the young ash trees can take place as early as the summer following sowing, so that the remaining plants can grow properly. If you wish to recover the plans removed for transplanting them in the ground or in pots, wait until the first winter to carry out the thinning.
How to thin ash?
If the removed plants are not to be collected, cut them below the collar with an asparagus picker. This prevents damage to neighboring plants. If they must be recovered, take a spade, lift the earth and pull on the plants to be removed, without injuring the others.
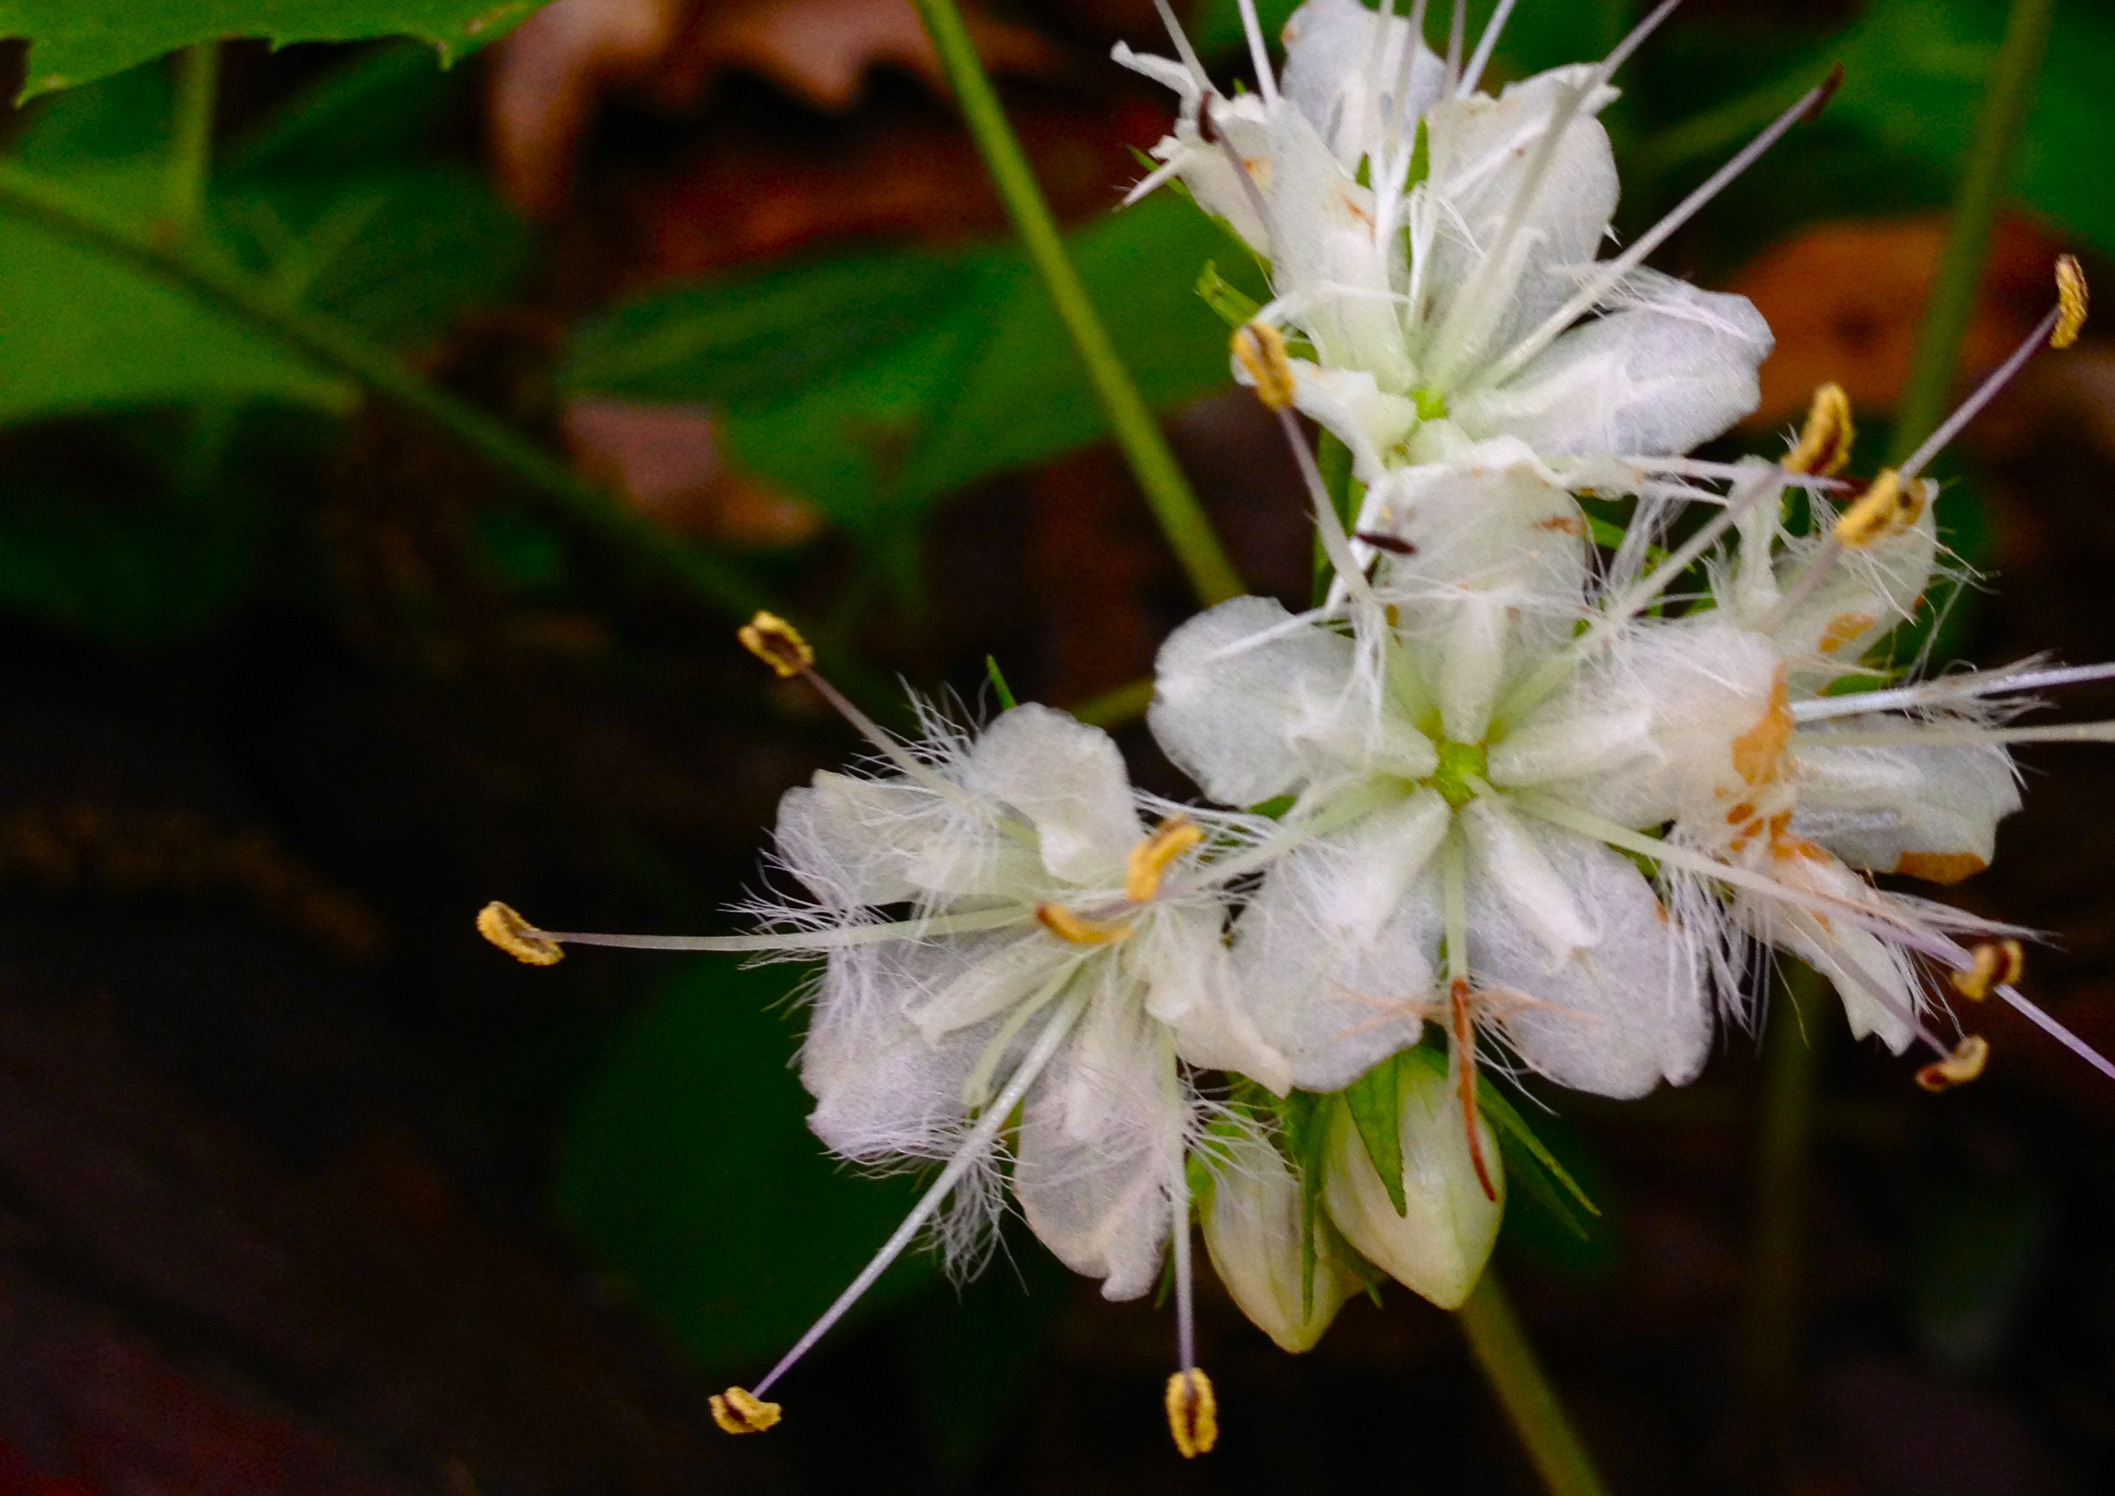
The hydrophyll of Canada ( Hydrophyllum canadense ) is a perennial plant almost unknown to most professionals, even specialized in the production of perennials and therefore, of course, to amateur gardeners.
Having cultivated it for over 15 years, I can attest to the robustness of Hydrophyllum canadense . This perennial plant is native to Canada mainly, although it is sometimes found in the state of Massachusetts in the United States, it is in New England that it is most frequent.
It grows spontaneously in forests of deciduous trees established on limestone, in slightly shaded undergrowth, in fertile soil, rich in humus and constantly humid. It forms sometimes large colonies, spreading quite slowly, covering the ground well with its large lobed leaves, which resemble maple leaves, of a beautiful bright green.
Insensitive to diseases and pests
In our white garden, she keeps company with the Hosta ‘Royal Standard’ , the Hesperis matronalis var. albiflora and the pretty Pachyphragma macrophyllumto early flowering. It grows as a small, rounded bush, very dense rather than a loose ground cover.
This is due, I think, to the strong presence of clay in our soil, which makes it more fertile than its original soil. It takes quite a while to establish, but when it does, it lives decades in place. The white flowers appear in tight cymes in the heart of the foliage.
They are sometimes light purple and are followed by strange fruits, a sort of big round and thorny capsules. The foliage disappears in winter and its resistance to cold is remarkable. I don’t know of any predators or diseases. Of course, she is not a “garden diva” like the hellebore, but in our park she participates in this biodiversity which is essential to any garden.
Sternbergias are rather easy to maintain once in place, provided you follow the rules of its planting.
Exposure: the sun in full face
These bulbous plants are in the nature of plants of full light which fear neither heat nor drought in summer. Unlike crocuses which like the coolness, sternbergias, on the other hand, need a very sunny exposure . In winter, their foliage must therefore be well lit away from the shade cast by other plants.
The rule of 5
The natural growth of tufts, after many years, leads to the multiplication of bulbs, which are more numerous, but smaller and therefore less flowering. Every 5 years, in summer, dig up the sternbergias, divide the root ball, immediately replant the chips in groups of 5, every 10 cm, at the same depth.
The earth passed by worms
Sternbergias appreciate rich, somewhat humus-bearing soil, but hate manure, even partially decomposed, or compost that is not ripe enough. To encourage them, add 250 g / m² of vermicompost or a composted amendment of the Brown Gold type.
The decimeter
Determine the planting depth of the sternbergias based on the soil texture. The base of the bulb should be 7 or 8 cm underground in clay soil (even stony) and between 10 and 12 cm in sandy soil. Too buried, the plant flowers poorly. Also avoid mulching it .
Trust
Once they have found their place, sternbergias are easy-going plants, but they need time to take hold. Not seeing them flower for 2 years after planting is not abnormal, as long as the foliage remains healthy and abundant.
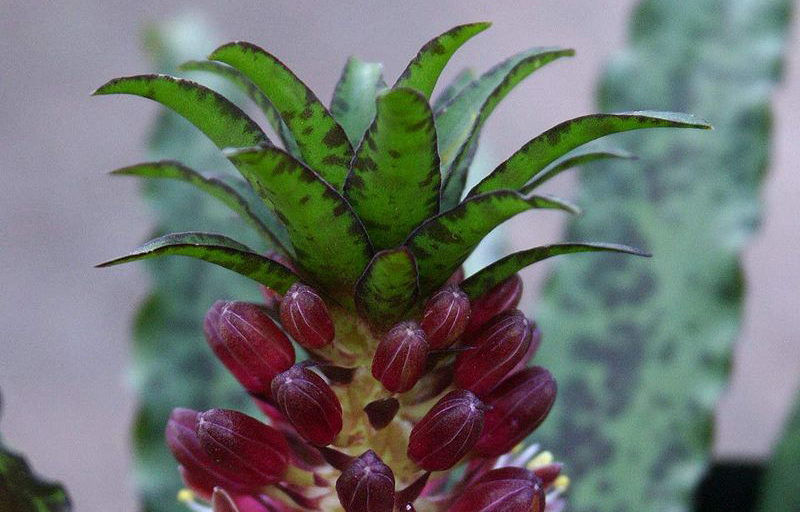
Called pineapple lily because of the peculiar shape of the inflorescence which looks a bit like this fruit, eucomis is a bulbous plant that can be propagated easily by cuttings from the large lanceolate leaves.
Advice: To speed up the recovery of the cuttings, add a little heat and humidity by covering the box with a transparent plastic cover (mini-greenhouse) or placing it outside, under a frame.
Good to know: The cuttings of the leaves make it possible to multiply a plant in greater number than by simple separation of the bulbils, often few.
Choosing the right plant
The eucomis usually multiplies by separating the bulbils that arise around the main bulb. But leaf cuttings also give excellent results. Choose a healthy plant with no visible signs of disease or insect attack.
Select and cut leaves
With a grafter, select the best formed leaves. You can prepare your cuttings in two ways either by cutting pieces of leaf of about ten centimeters, or by cutting the leaf along the vein in the longitudinal direction.
Prepare the box
In a box, pierced for the flow of the overflow of irrigation water, place a layer of gravel for drainage. Cover with a mixture of finely sifted potting soil and sand, in equal parts. Tamp with a wooden board.
Wait for the bulbils
Then, gently, push in your cuttings about 1 cm, pressing down with your fingers to hold them. Water in fine rain. After a few weeks, bulbils will appear at the cut part of the leaf buried in the ground.
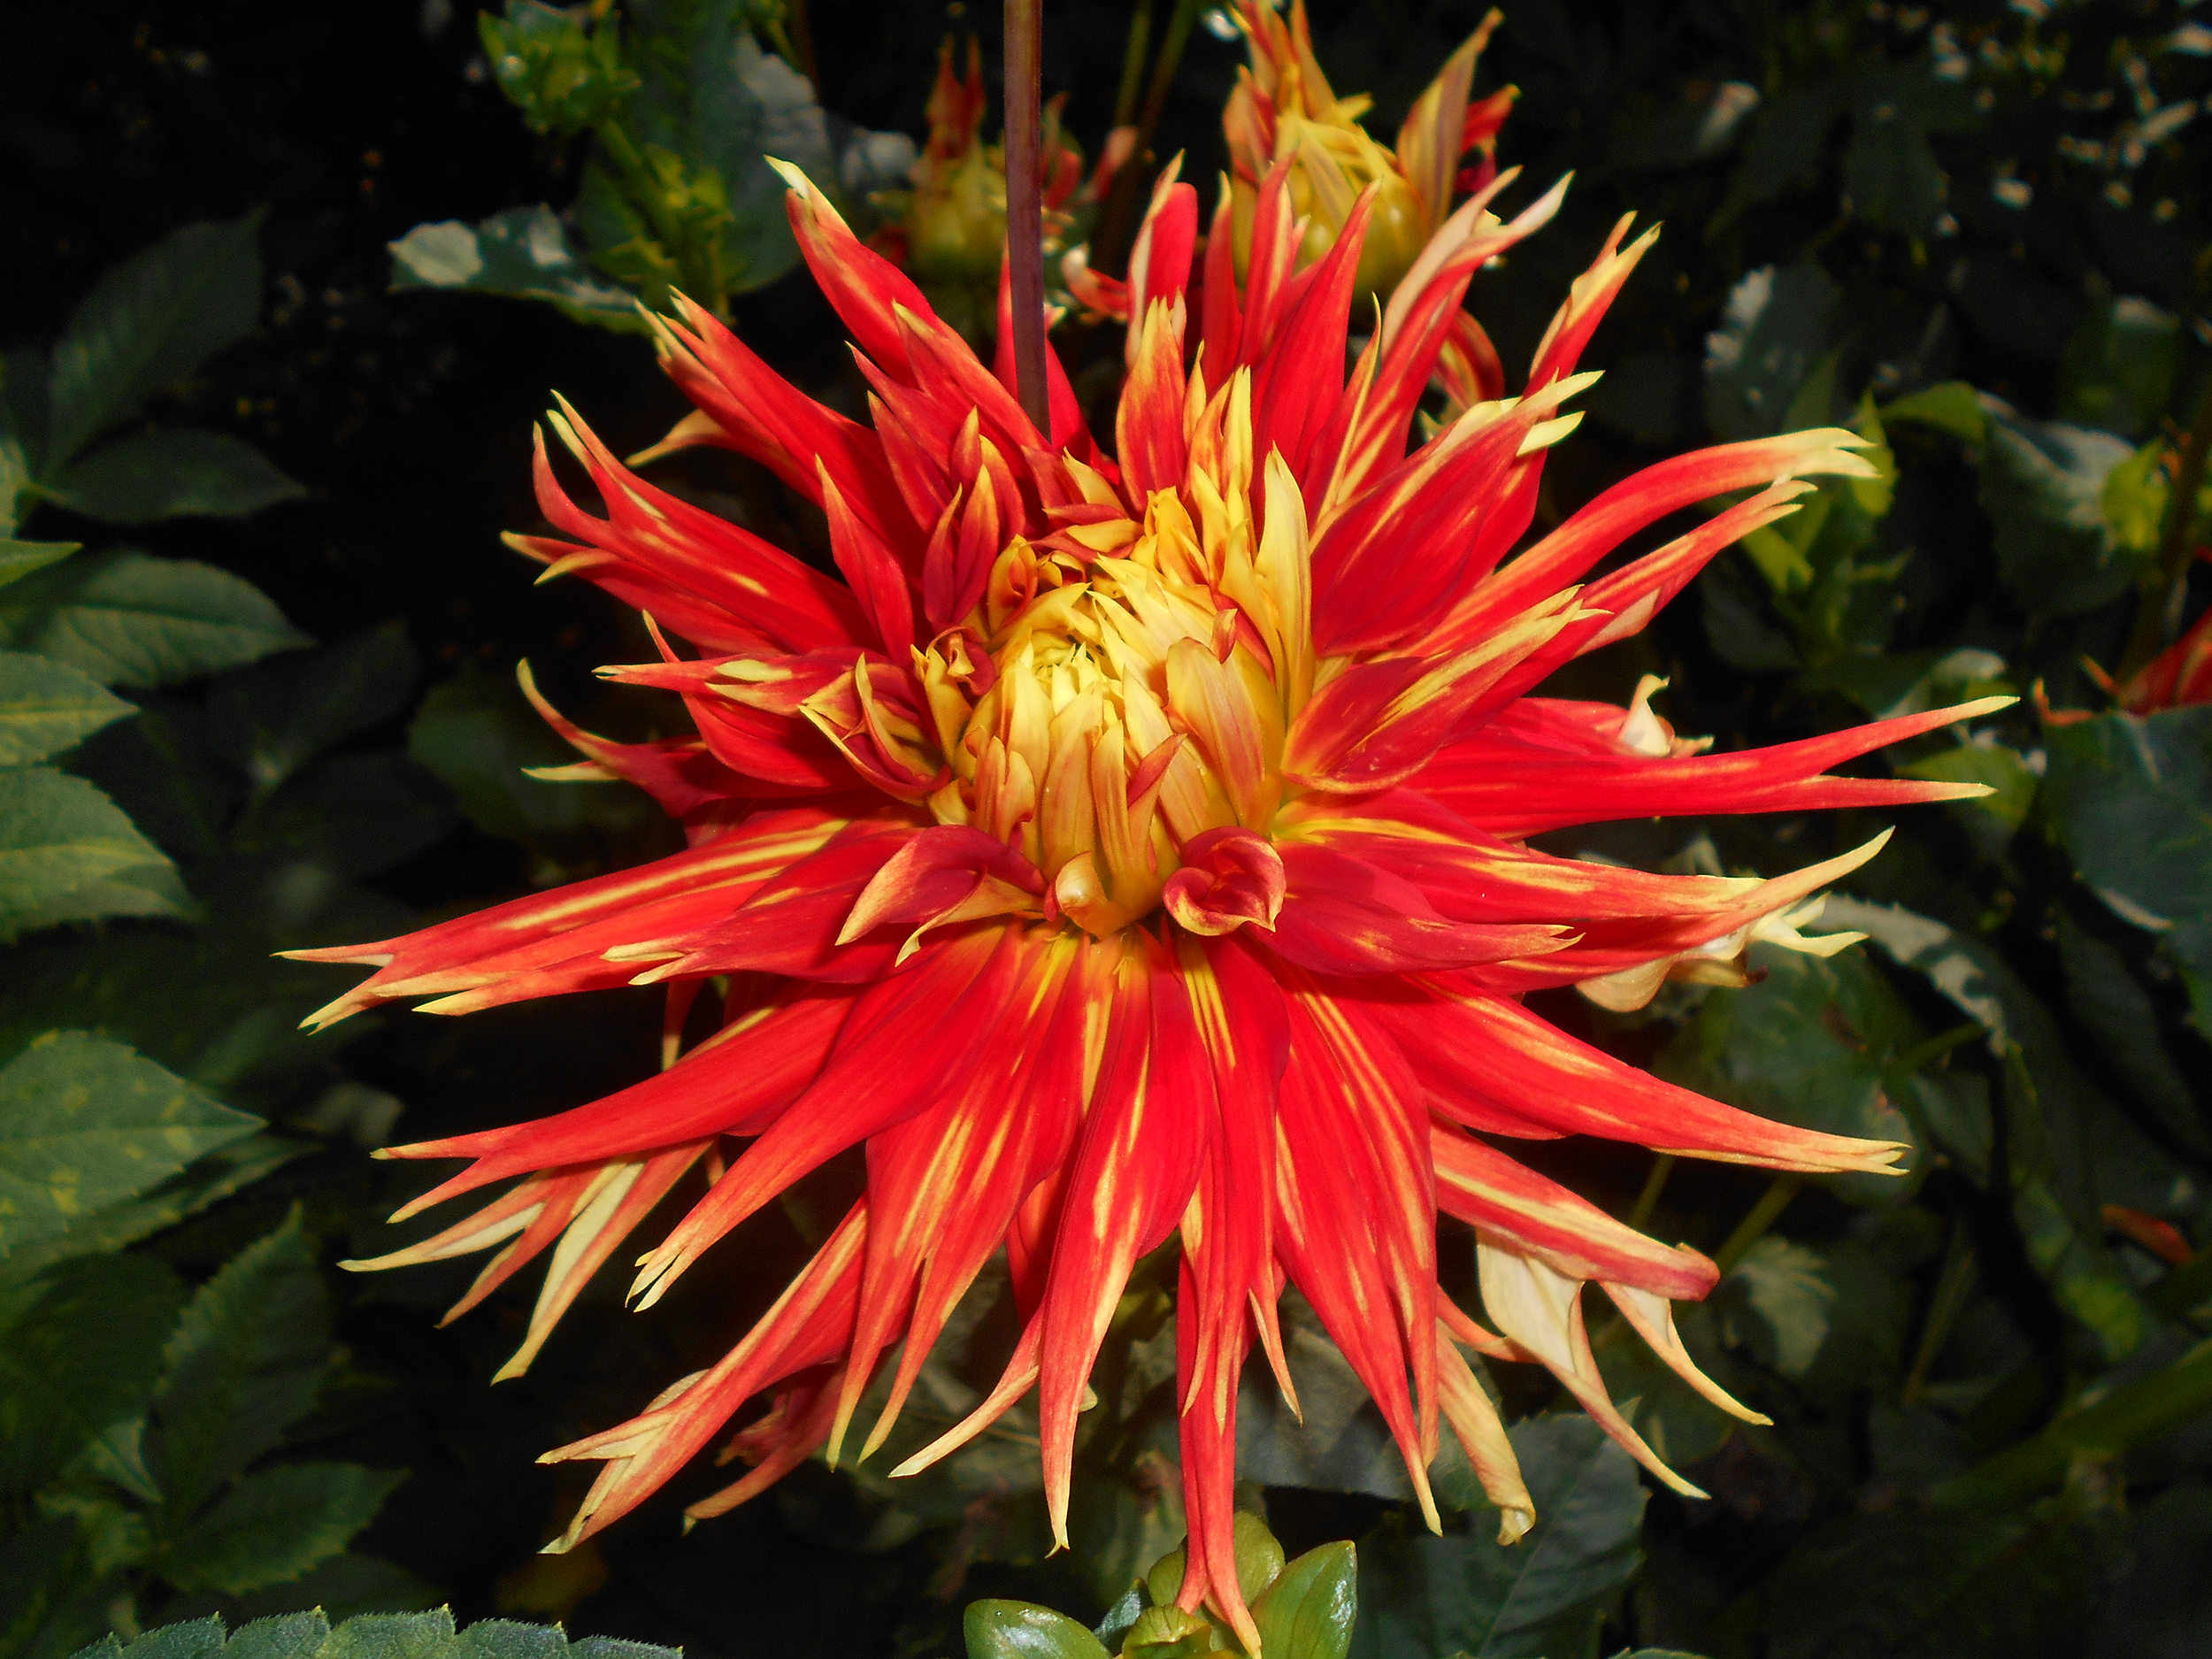
‘Showntell’ is one of those few varieties whose luminosity is an irresistible eye-catcher. In fact, it is one of the most remarkable dahlias in the gardens of Clos du Coudray.
This dahlia produces large cactus flowers with bright orange petals chiseled in gold. Robust, it measures between 90 cm and 1.10 m depending on the richness and nature of the soil. Its color goes wonderfully with perennial plants with yellow flowers such as rudbeckias, solidagos, heleniums, inulas … But also with annuals such as tithonias, ornamental tobaccos with white flowers, marigolds and grasses such as large miscanthus. This flower prefers rich soil and full sun exposure.
Culture
All floors are suitable as long as they are not soggy. Choose a location sheltered from the winds, otherwise you will have to stake your plants. Remember, dahlias are greedy! Prepare your soil by bringing in well-rotted compost. To get very large flowers, remove the buttons below the terminal button. In the event of heat or strong drought, water regularly. In regions where the ground freezes in winter, dig up the tubers in autumn without washing them and place them in a dry and frost-free room. In other regions with mild winters, it is possible to leave the tubers in the ground if it is not soggy in winter: in this case, cut all the stems low to the ground in November, then spread a layer of dead leaves on the ground. the strains. Place a piece of wire mesh and bricks to maintain this protection.